
The Memory Behind This Treat
The first time I whipped up these Homemade Carrot & Pumpkin Chews for Dogs, it was a chilly autumn day, and Max, my Labrador, had just returned from a muddy romp in the park. His eyes sparkled with excitement as leaves crunched under his paws. I wanted to treat him to something special, something that mirrored the vibrant colors and coziness of the season. So, I headed to the kitchen and gathered ingredients that would not only delight his taste buds but also pack a nutritional punch.
As I grated the carrots and mixed them with the pumpkin puree, the kitchen filled with a warm, earthy aroma. Max lay sprawled on the floor, his nose twitching with anticipation. It reminded me of how much joy these simple moments bring—not just to him, but to me as well. The sight of him eagerly wagging his tail by the oven door was the highlight of my day. These chews quickly became a favorite, connecting us in a shared moment of love and health.
Every time I bake these snack sticks, it feels like a small celebration of our bond. They’re not just treats; they’re a reminder of the crisp fall walks and the simple joy of making something with love. If you’re looking to create a special memory with your pup, these chews are a wonderful way to start. For more dog-friendly recipes, check out our Peanut Butter Biscuits or Sweet Potato Chews.
How To Make It (Mix & Ingredients)
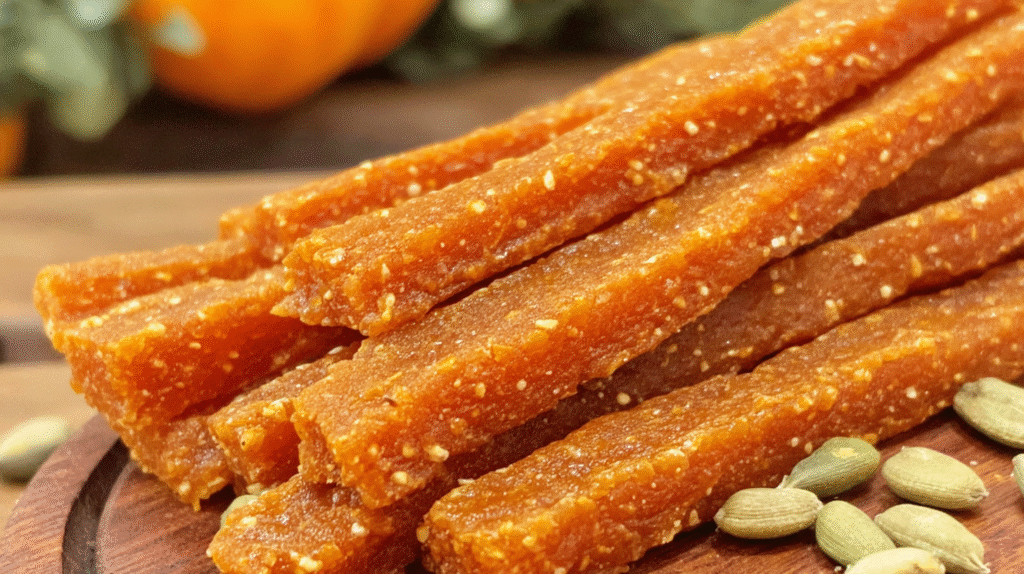
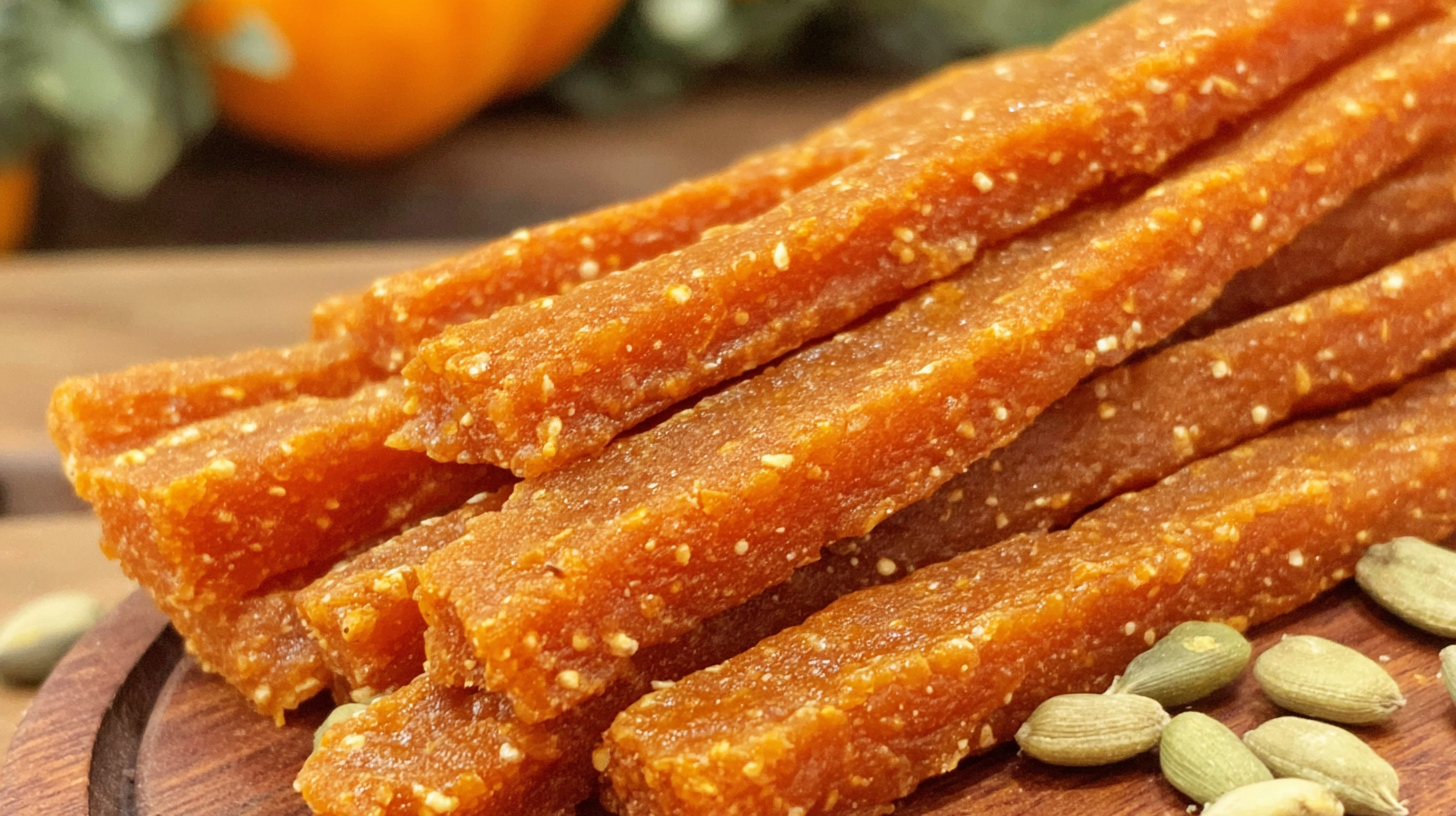
Ready to whip up some Homemade Carrot & Pumpkin Chews for Dogs? Let’s dive into the heart of the kitchen action! First, gather your ingredients. You’ll need 1 cup of pure pumpkin puree (make sure it’s not the sugary pie filling), 1 cup of grated carrots, and 2 cups of oat flour. If you want these chews to hold together a bit better, toss in an egg. For moisture, you can opt for either a tablespoon of coconut oil or just plain water.
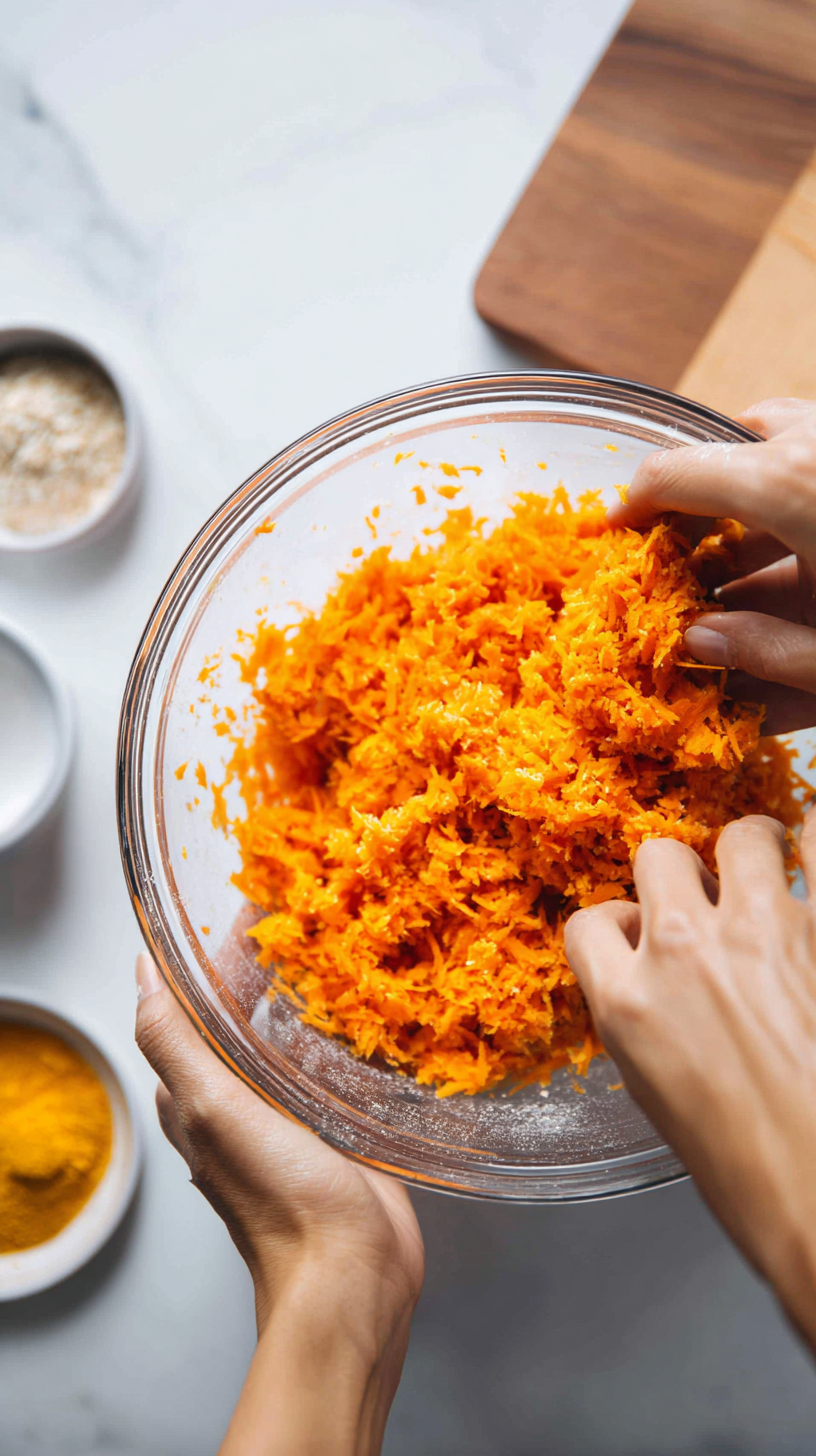
Start by preheating your oven to 350°F (175°C). Mix your pumpkin puree, grated carrots, and egg in a large bowl until they’re well combined. Gradually incorporate the oat flour, stirring as you go. The mixture should form a dough that’s firm yet slightly sticky. If it seems a bit dry, don’t hesitate to add a splash of water or a dollop of coconut oil. Your hands may get a little messy, but isn’t that part of the fun?
Roll the dough into stick shapes on a lightly floured surface. Aim for uniform thickness to ensure even baking. Place these soon-to-be-treats on a parchment-lined baking sheet, making sure they have a little breathing room. Pop them in the oven for 25-30 minutes until they’re golden and firm. For added crunch, let them cool in the oven after you’ve turned off the heat. Once cooled, they’re ready to be devoured by your eager pup!
Make-Ahead & Storage
When it comes to these homemade carrot & pumpkin chews for dogs, a little planning goes a long way. These delicious snack sticks can be made ahead of time, ensuring you always have a healthy treat on hand for your furry friend. Once you’ve baked these golden goodies, allow them to cool completely on a wire rack. This helps maintain their texture and prevents any unwanted sogginess.
To keep your treats fresh, store them in an airtight container in the refrigerator. This simple step will keep your carrot and pumpkin chews tasty for up to one week. If your pup isn’t ready to chow down on all the sticks within that time frame, don’t fret! These snacks are freezer-friendly. Place any extras in a labeled, zip-top bag and freeze them for up to three months. Not only does this save you time, but it also guarantees Max will have a crunchy nibble whenever he pleases.
Remember to defrost the chews at room temperature before serving them to your dog. This way, they’ll retain their delightful crunchiness. If you’re looking for more homemade goodness, try our Sweet Potato Crunchies or Apple Cinnamon Bites—both perfect for storage and just as healthy!
Best Ingredients & Party Variations
When it comes to crafting the perfect Homemade Carrot & Pumpkin Chews for Dogs, choosing top-quality ingredients can make all the difference. Fresh, vibrant carrots and pure pumpkin puree lay the foundation for these treats. Carrots are not only crunchy and delicious but brimming with beta-carotene and fiber, supporting your dog’s vision and digestion. Pumpkin, on the other hand, is a tummy-soothing superstar, ideal for dogs with sensitive stomachs. Remember, it’s crucial to use pure pumpkin puree, not the sweetened pumpkin pie filling, to keep things healthy.
If you’re looking to mix up the flavor, consider some delightful party variations. For a richer taste, add a spoonful of dog-friendly peanut butter. Most pups go wild for its nutty aroma! You can also swap out the carrots with sweet potatoes or zucchini for a change in texture and nutritional benefits. Adding a pinch of cinnamon can enhance the flavor while providing anti-inflammatory benefits—just ensure it’s Ceylon cinnamon as it’s safer for dogs.
Hosting a doggy gathering? Turn these chews into mini-bite-sized versions. Simply shape the dough into small balls or disks before baking. Not only will these smaller treats be perfect for sharing, but they’ll also make a delightful display on your treat table. With these variations, you can cater to all the canine taste preferences at your next dog party!

FAQ’s About Homemade Carrot & Pumpkin Chews for Dogs
Are carrot and pumpkin good for dogs?
Yes, carrots and pumpkin are both excellent for dogs. Carrots are low in calories and high in fiber and beta-carotene, which is great for your pup’s vision and digestion. Pumpkin, on the other hand, is rich in vitamins A, C, and E, along with essential minerals. It’s also fantastic for digestive health because of its high fiber content. Just ensure the pumpkin is plain and not mixed with any spices or sugars.
What can I mix with pumpkin for my dog?
You can mix pumpkin with a variety of dog-safe ingredients to create nutritious treats. Carrots, sweet potatoes, and even a bit of plain yogurt can be great additions. For extra protein, you might add a small amount of cooked chicken or egg. Make sure to avoid adding any ingredients that are harmful to dogs, such as onions or garlic. Always introduce new foods gradually to avoid stomach upset.
How do I make carrot puree for dogs?
Making carrot puree is simple and quick. Start by peeling and chopping the carrots into small pieces. Boil or steam them until they’re tender, then blend or mash them until smooth. You can add a little water to achieve the desired consistency. Ensure the puree is cooled before serving it to your dog.
Are pumpkin chews good for dogs?
Absolutely, pumpkin chews are a wonderful treat for dogs. They provide a healthy dose of vitamins and minerals while also helping to keep your dog’s digestive system in check. These chews are especially beneficial for dogs who need a little extra fiber in their diet. Plus, the chewy texture can help with dental health by reducing plaque buildup. Always monitor your dog for any reactions when introducing a new treat.
Conclusion
Making these Homemade Carrot & Pumpkin Chews for Dogs is more than just a culinary adventure—it’s a way to share love and joy with your furry family member. As you mix the ingredients and bake with anticipation, you’re creating a special bond that goes beyond words. Whether it’s a lazy afternoon or a Sunday family baking session, these chews bring everyone together, tails wagging and smiles all around.
I hope you feel the same warmth and satisfaction that I do whenever I see Max eagerly waiting for his favorite treat. Give this recipe a try, and watch your pup’s eyes light up with delight. It’s a simple joy that brings the whole family closer.
For more delicious recipes like this, follow us on social media! Keep up with our adventures on Facebook and Pinterest to discover new and exciting ways to treat your dog right. Happy baking!
Wholesome Carrot & Pumpkin Chews for dogs: Treat Your Pup Right!
Ingredients
Method
- 1. Preheat oven to 350°F (175°C) and line a baking sheet with parchment paper.
- 2. In a large bowl, mix pumpkin puree, grated carrots, and egg until combined.
- 3. Gradually add oat flour, stirring to form a slightly sticky dough.
- 4. Roll dough into stick shapes on a lightly floured surface.
- 5. Place sticks on baking sheet with space between each.
- 6. Bake for 25-30 minutes until golden and firm.
- 7. Allow to cool completely on a wire rack.


