

The Memory Behind This Treat
The very first batch of these Sourdough Dog Treats happened on a Sunday when my kitchen was a mess of mason jars and bubbling starter. I remember staring at my jar of unfed sourdough discard, feeling guilty about pouring it down the drain yet again. Max was camped out by my feet, giving me those hopeful “is that for me?” eyes that only a dog can pull off. I had just fed my starter for a loaf of bread and thought, “Why not pay a little sourdough starter tax to Max?” So I whisked some discard with an egg, a spoonful of natural peanut butter, and a handful of oats, rolled the dough out on a flour-dusted counter, and crossed my fingers while they baked.
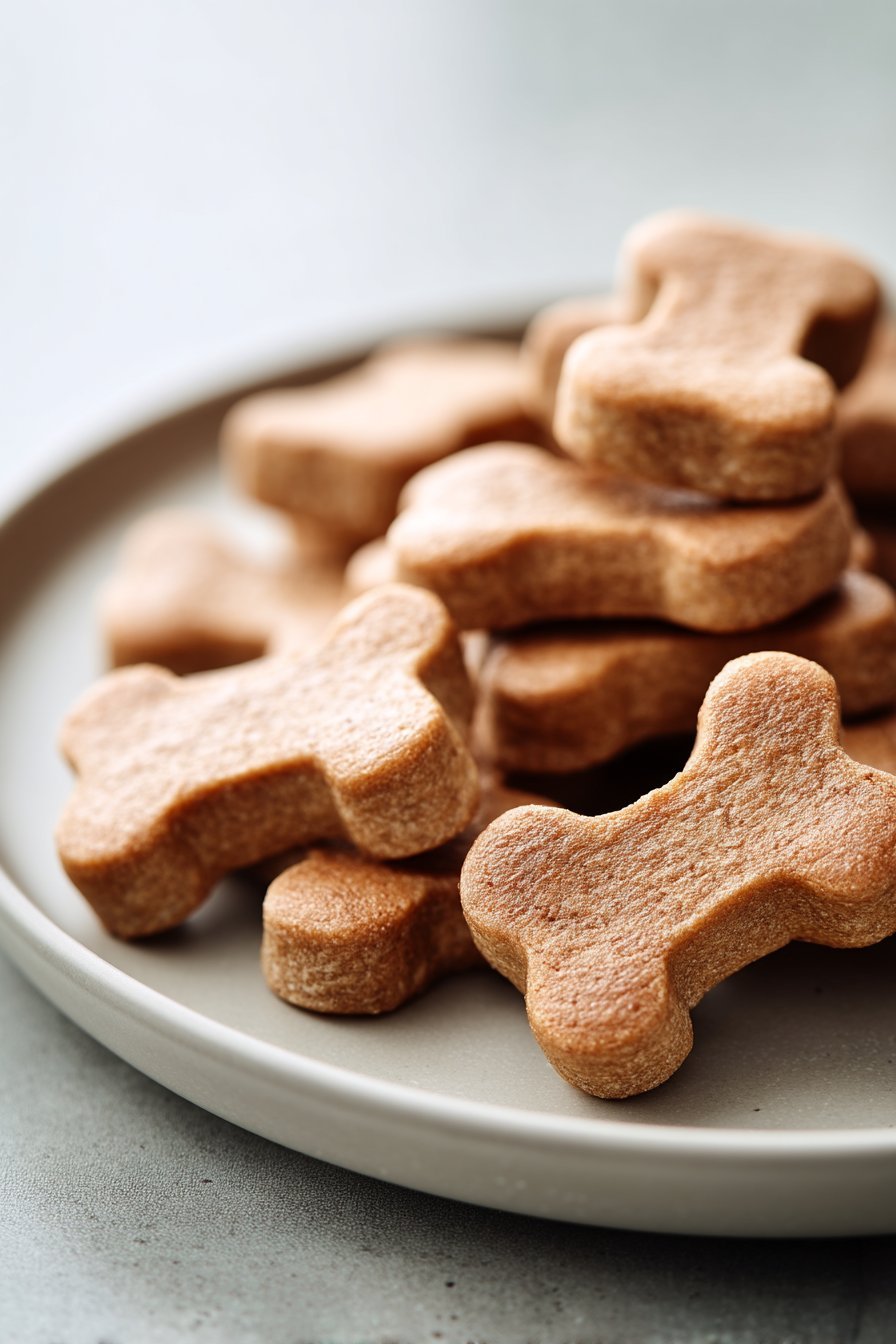
As the Sourdough Dog Treats baked, the kitchen filled with this cozy, nutty, toasty smell that made Max park himself right in front of the oven door. He didn’t move once—not even when the mailman came, which is saying something. When the treats finally cooled, I broke one in half; it had that firm, crunchy snap I look for in good homemade dog treats. Max took one, trotted to his favorite spot, and then came back immediately, licking his lips and asking for another in that very persuasive Labrador way. That’s when I knew I’d found a keeper recipe: simple ingredients, no waste, and a treat that could handle being tossed into a bag for walks, hiking adventures, or stuffed into a puzzle toy without crumbling to dust.
How To Make It (Mix & Ingredients)
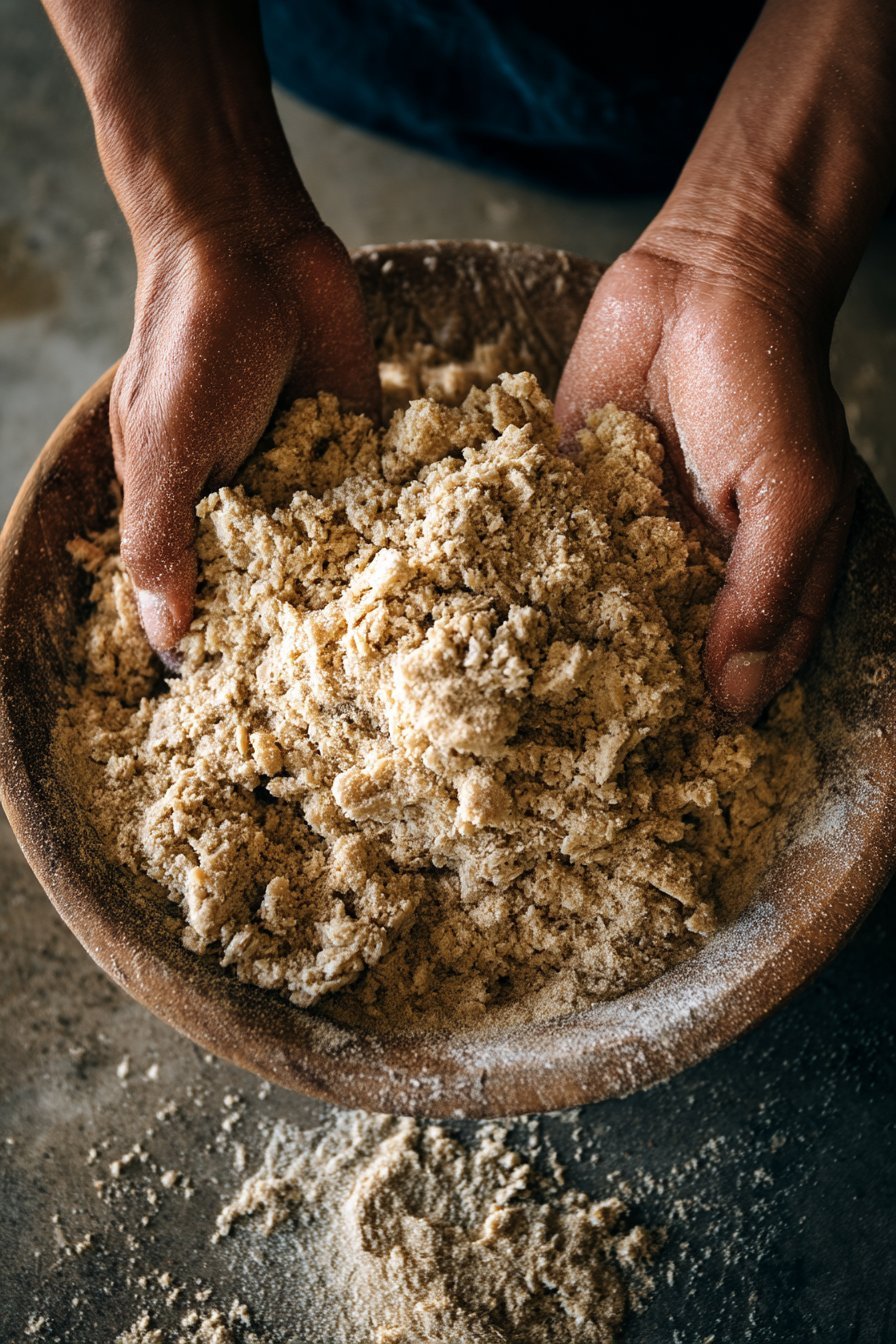
To make these Sourdough Dog Treats, start by grabbing a medium mixing bowl and adding your 1 cup of unfed sourdough starter. It can come straight from the fridge—no need to warm or refresh it, which makes this a perfect “use-the-discard” recipe. Crack in the egg and whisk it lightly right in the bowl to break it up, then stir in the peanut butter until the mixture looks mostly smooth and creamy. If you’re using the pumpkin puree or unsweetened applesauce, mix that in now for a little extra moisture and flavor. It will look looser than dough at this stage, more like a thick batter, and that’s exactly what you want.
Instructions Process of Sourdough Dog Treats
Now sprinkle in the rolled oats and stir to combine; they’ll start to bulk up the mixture and give these Sourdough Dog Treats their hearty, chewy texture. Add the whole wheat flour about ¼ cup at a time, stirring after each addition. You’re aiming for a soft, slightly tacky dough that pulls away from the sides of the bowl but doesn’t crumble—think thick cookie dough, not bread dough. If it’s too sticky to handle, dust in another tablespoon or two of flour; if it’s dry or cracking, add a tiny splash of water or an extra teaspoon of pumpkin or applesauce. When the dough holds together in a ball and you can press it with your fingers without it glueing to everything, it’s ready to roll, cut, and bake into crunchy, tail-wagging dog treats.
Make-Ahead & Storage
One of my favorite things about these Sourdough Dog Treats is how easy they are to prep ahead so you’re never caught without a snack for your pup. You can make the dough in the morning, bake later in the day, or even chill the dough for up to 24 hours before rolling and cutting. Just wrap it tightly in plastic or place it in an airtight container so it doesn’t dry out. Once baked and fully cooled, store the treats in an airtight jar or tin at room temperature for 5–7 days. I like to keep a small container on the counter for everyday use and stash the rest away so they stay nice and crunchy.
For longer storage, these Sourdough Dog Treats freeze beautifully. Lay the cooled treats in a single layer on a baking sheet, freeze until solid, then transfer them to a labeled freezer bag or container. They’ll keep well for up to 2 months in the freezer. You can give them to your dog straight from frozen as a crunchy, longer-lasting chew, or let them sit on the counter for a few minutes to soften slightly. If your kitchen runs warm or humid, avoid storing them in a loose cookie jar, or they may soften—if that happens, you can pop them back into a 300°F oven for 5–10 minutes to re-crisp, then cool completely before storing again.
Best Ingredients & Party Variations
When you’re choosing ingredients for Sourdough Dog Treats, think “simple, natural, and gentle on the tummy.” Your unfed sourdough starter should be plain—just flour and water, no salt, sugar, garlic, onions, or fancy mix-ins. Whole wheat flour adds a lovely nutty smell and extra fiber; if your pup is sensitive, you can swap in oat flour or a half-and-half mix of whole wheat and white flour for a softer crunch. Rolled oats make the treats heartier and more filling, and a single large egg helps bind everything together so the shapes hold nicely. For flavor, I like natural peanut butter with no added sugar, salt, or sweeteners—never use xylitol, even in trace amounts, because it’s extremely toxic to dogs. That optional spoonful of pumpkin or unsweetened applesauce adds moisture and a touch of sweetness that most pups go wild for.
Once you’ve mastered the base recipe for your Sourdough Dog Treats, you can have fun turning them into “party snacks” for dog birthdays, adoption anniversaries, or playdates. For a birthday batch, use tiny bone- or heart-shaped cutters and press in a single blueberry or a few unsweetened carob chips on top of each treat before baking. For a “spa day” theme, stir in a teaspoon of finely chopped parsley to help freshen breath and give the biscuits pretty green flecks. Hosting a dog playdate? Bake smaller, bite-size training nibbles by rolling the dough a bit thinner and cutting into minis—perfect for sharing and not overfeeding. You can even make a mixed tray with some crunchy pieces and some slightly thicker, chewier ones, so each dog finds a favorite texture.
Serving of Sourdough Dog Treats
Conclusion
Homemade treats have a funny way of turning an ordinary day into something a little bit magical, don’t they? When I first started baking these, Max would trot into the kitchen the second he heard the oven beep, tail thumping like a drum. Moments like that remind me that it’s not just about the snack—it’s about the time, the care, and the love you pour into it. These sourdough dog treats are really tiny, crunchy reminders that your dog’s happiness begins right in your kitchen.
I hope this recipe becomes one of those little rituals in your home too. Maybe it’s your Sunday baking project, or the special “thank you” after a long walk in the rain. However you use it, you’re not only giving your pup something wholesome—you’re also creating cozy memories that they’ll come running for again and again.
When you’re ready, pull out that sourdough starter, preheat the oven, and give this recipe a try. Your pup will be your most eager taste tester.
For more delicious recipes like this, follow us on social media!
What are sourdough dog treats, and why use sourdough discard?
Sourdough dog treats are simple, baked snacks for dogs made with your unfed sourdough starter (discard), whole wheat flour, oats, egg, and dog-safe peanut butter. The discard adds a gentle tang and helps bind the dough without needing extra yeast or rising time. Using sourdough discard means you waste less from your regular bread baking routine. As long as your starter is plain (just flour and water) and not made with added salt, sugar, or commercial yeast, it’s safe to use for your pup. These treats have a firm, crunchy texture many dogs love to chew.
Is this sourdough dog treat recipe safe for my dog?
This recipe uses dog-friendly ingredients like whole wheat flour, rolled oats, egg, and **xylitol-free** natural peanut butter. For most healthy adult dogs, these Sourdough Dog Treats are a safe, occasional snack. If your dog has a history of food allergies, wheat sensitivity, or pancreatitis, check with your vet before introducing a new treat. Always start with a small piece the first time to see how your dog’s stomach handles it. **Never use peanut butter with xylitol, added sugar, or chocolate, as these can be dangerous or toxic to dogs.**
Can I change the flours or add extra flavors to these treats?
You can swap the whole wheat flour for oat flour or brown rice flour if your dog is sensitive to wheat, but you may need to add a little more or less to get a workable dough. Good flavor add-ins include a spoonful of pure pumpkin puree, unsweetened applesauce, or finely shredded carrot. Keep total moisture similar to the original recipe so the treats still bake up firm and crunchy. Avoid any ingredients toxic to dogs such as onion, garlic, chocolate, grapes, raisins, nutmeg, or artificial sweeteners. When in doubt, keep it plain and simple—your dog will still think you’re a hero.
Recipe

Easy Homemade Sourdough Dog Treats
Ingredients
Method
- Preheat the oven to 350°F and line a baking sheet with parchment paper or a silicone baking mat.
- In a medium mixing bowl, add the unfed sourdough starter and egg, and whisk until the egg is broken up and combined.
- Add the peanut butter and optional pumpkin puree or applesauce, and stir until the mixture looks mostly smooth and creamy.
- Stir in the rolled oats until evenly distributed throughout the mixture.
- Add the whole wheat flour about 1/4 cup at a time, stirring after each addition, until a soft, slightly tacky dough forms and pulls away from the sides of the bowl.
- If the dough feels very sticky, sprinkle in 1–2 tablespoons of additional flour; if it feels dry or crumbly, mix in 1–2 tablespoons of water, a little at a time, until it holds together.
- Lightly flour a clean work surface, turn the dough out onto it, and knead gently 3–4 times until smooth and uniform.
- Roll the dough out to about 1/4-inch thickness, dusting the top lightly with flour if needed to prevent sticking.
- Use a small cookie cutter or knife to cut the dough into desired shapes or small squares, and place them close together on the prepared baking sheet.
- Bake for 25–30 minutes, until the treats feel firm and the edges are lightly dried.
- Turn off the oven and, for extra crunch, leave the treats inside with the door slightly ajar for 10–15 minutes.
- Transfer the treats to a wire rack and cool completely before serving to your dog or storing.
Notes
- Introduce any new treat slowly, and adjust portions based on your dog’s size and daily calorie needs.
- For a longer-lasting chew, roll the dough slightly thicker and bake on the longer end of the time so the treats dry out more.
- Store cooled treats in an airtight container at room temperature for up to 7 days, or freeze for up to 2 months.
- If the treats soften over time, re-crisp them in a 300°F oven for 5–10 minutes, then cool completely before returning to storage.


