
The Memory Behind This Treat
The first time I tested these Beef & Vegetable Chew Sticks, I was desperate for 20 quiet minutes to answer emails while Max was in one of his “shadow mode” days. I had a bowl on the counter with warm, crumbled lean beef, a little pile of steamed green beans, and a bright orange mound of grated carrot. As I stirred in the oats, flaxseed, and egg, Max parked himself right at my feet, nose tilted up, sniffing like a tiny food inspector. When the chew sticks hit the oven, the whole kitchen filled with that cozy Sunday-roast smell, and his tail started doing that slow, hopeful wag. By the time the timer beeped, he was already sitting by the oven door like he’d personally supervised every step.
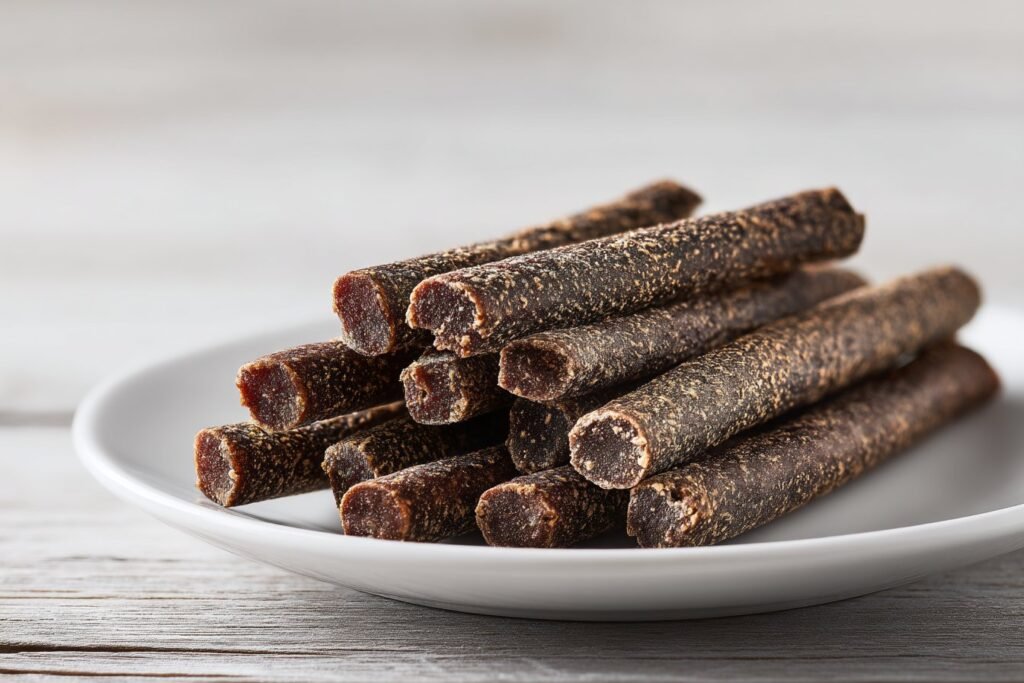
I remember pulling the first tray out and thinking how much these looked like the store-bought chew sticks I used to keep in a jar—except I actually knew what was inside them. No mystery “meat flavor,” no strange shiny coating, just simple beef, vegetables, and pantry staples pressed into firm, golden-brown sticks. I let them cool on the rack, and Max whined softly every time I walked past without handing him one. Once they were cool enough, I offered him a Beef & Vegetable Chew Stick on his bed, just to see if it might become our new “settle down” treat like my baked banana oat bones and sweet potato dog cookies. He flopped down, held it between his paws, and happily chewed for a solid stretch of quiet, contented time—and that’s when I knew this recipe was going straight into our regular easy dog meals rotation.
How To Make It (Mix & Ingredients)
To make your Beef & Vegetable Chew Sticks, start by making sure your ground beef is fully cooked, cooled, and crumbled so there are no greasy clumps. In a large mixing bowl, combine the beef with the finely grated carrot and the soft, lightly cooked green beans; the smaller you chop the veggies, the easier the sticks will hold together. Stir in the rolled oats and ground flaxseed so they soak up some moisture and add that nice fibrous texture dogs love in a chew. Add the egg and olive oil (or melted coconut oil) next, then mix with a sturdy spoon or clean hands until everything looks evenly coated and slightly sticky, like a soft meatloaf mixture.
Instructions Process of Beef & Vegetable Chew Sticks
Now it’s time to bring in the flour to give your Beef & Vegetable Chew Sticks their structure. Start with about 1 cup of whole wheat or oat flour and work it into the mixture gradually, adding more a tablespoon or two at a time until the dough becomes firm but still pliable—not crumbly, not soupy. You want a dough you can roll into ropes without it falling apart; if it sticks like glue to your hands or the counter, dust with a bit more flour. Lightly flour your work surface, then scoop portions of dough and roll them into long sticks about ½ inch thick, pressing gently to make sure there are no cracks where they might break during baking. Lay them on a parchment-lined baking sheet with a little space between each one, and you’re ready to move on to shaping and baking your homemade dog treats.
Make-Ahead & Storage
One of my favorite things about these Beef & Vegetable Chew Sticks is how well they fit into real life, busy schedules and all. You can easily double the batch on a Sunday, then stash them for the week so you always have a wholesome, high-value chew ready. After baking, let the chew sticks cool completely on a wire rack—this helps them dry out a bit more so they last longer and stay pleasantly firm. Once cool, store them in an airtight container in the fridge for up to 5–6 days. For a little extra insurance, I like to slip a sheet of paper towel into the container to absorb excess moisture and keep the texture just right.
If you want to make Beef & Vegetable Chew Sticks ahead for the whole month, the freezer is your best friend. Lay the cooled sticks in a single layer on a baking sheet, freeze until solid, then transfer them to a labeled freezer bag, pressing out as much air as you can. They keep well for about 2 months this way without losing too much flavor or chew. You can thaw 1–2 sticks in the fridge overnight, or just let your dog enjoy one slightly chilled straight from the freezer as a longer-lasting treat on warm days. Always check for any off smells, mold, or sliminess before serving, especially if your kitchen runs warm or you’ve stored them near other strong-smelling foods in the fridge.
Best Ingredients & Party Variations
To make the most irresistible Beef & Vegetable Chew Sticks, start with lean ground beef (93/7 or leaner) so your dog gets protein without a greasy overload. I like to cook the beef ahead of time and blot off extra fat with a paper towel before crumbling it, especially for pups with sensitive tummies. Fresh, brightly colored vegetables like finely grated carrot and tender green beans add natural sweetness, crunch, and fiber. Rolled oats and ground flaxseed help bind everything together while sneaking in extra omega-3s for skin and coat. For dogs that can’t handle wheat, swap the whole wheat flour for oat flour and add it slowly until the dough is firm but still pliable—think cookie dough you can easily roll between your hands.
Once you’ve nailed the base Beef & Vegetable Chew Sticks recipe, you can create fun “party” variations for birthdays, gotcha days, or playdates. For a “birthday confetti” version, add a tablespoon of finely chopped, steamed peas and shape the dough into slightly shorter sticks for easy sharing. If your dog loves extra crunch, bake the sticks a bit longer at a lower temperature so they dry out more and become a firmer chew. For a gentle “tummy-care” batch, skip any new add-ins and use plain oat flour, then cut the sticks thinner so they’re easier to digest. You can even make “mini chews” for training by rolling the dough into pencil-thick logs and slicing them into bite-size pieces before baking—same comforting flavor, just in party-friendly portions.
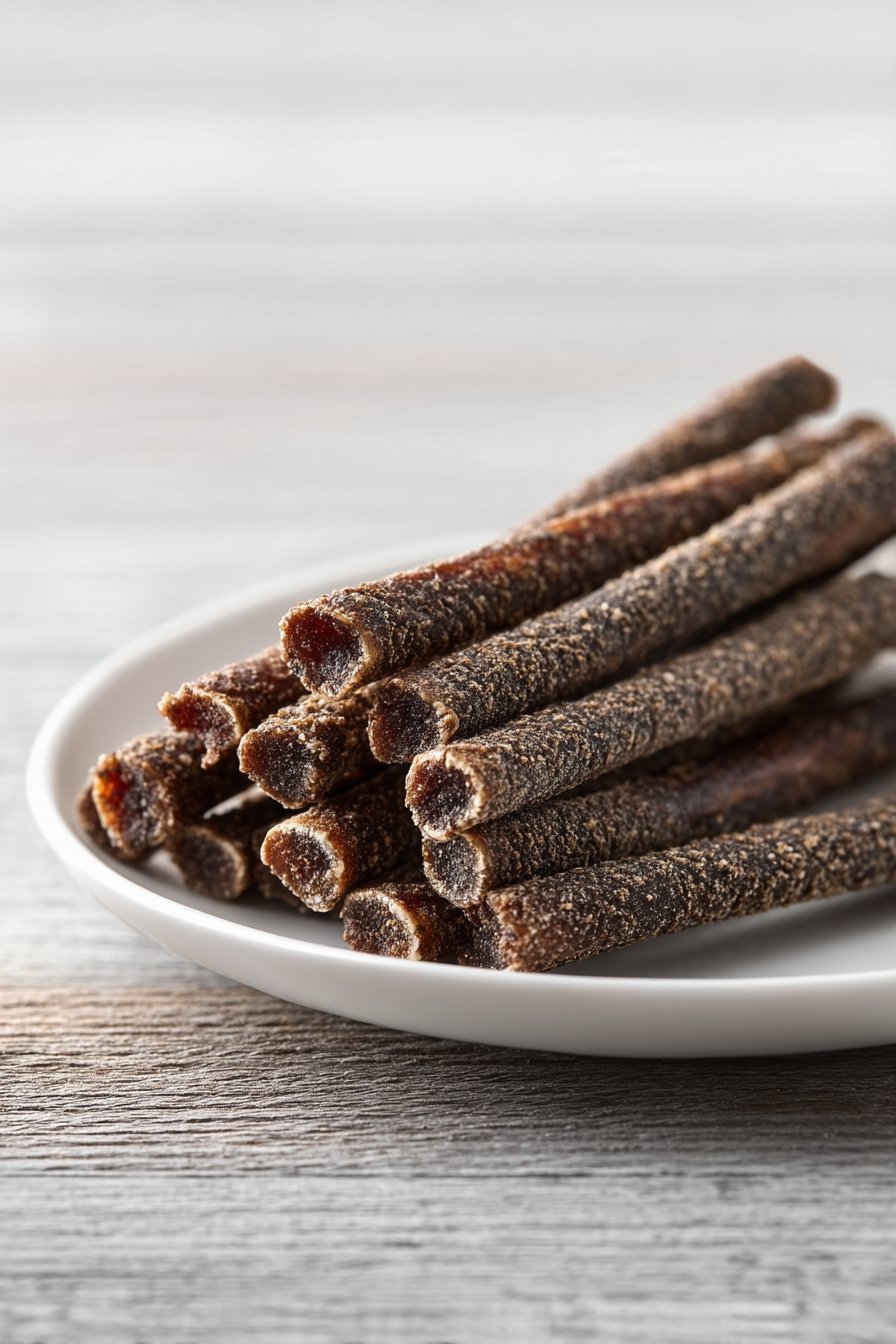
Serving of Beef & Vegetable Chew Sticks
Conclusion
When I pull a batch of these out of the oven and Max trots into the kitchen with that hopeful look in his eyes, I’m reminded why I love making homemade treats so much. It’s not just about healthier snacks or saving a bit of money—it’s about those small, joyful moments you share with your dog. Watching them crunch happily, feeling their head rest on your knee in quiet gratitude… those are the memories that stick.
I hope these Beef & Vegetable Chew Sticks bring that same happiness into your home. Whether you bake them on a lazy Sunday, for a special “gotcha day,” or as a simple midweek surprise, you’re doing something kind, thoughtful, and loving for your best friend. Don’t worry if they’re not perfectly shaped—your dog will only care that they were made by you.
I’d love for you to give this recipe a try and see how your pup likes it. For more delicious recipes like this, follow us on social media!
What exactly are Beef & Vegetable Chew Sticks for dogs?
Beef & Vegetable Chew Sticks are homemade dog treats made from cooked lean ground beef, dog-safe vegetables, oats, and flaxseed, shaped into firm sticks your pup can happily gnaw on. They offer a mix of protein, fiber, and healthy fats in a fun, chewy form. Unlike many store-bought chews, you control every ingredient, so there are no hidden fillers or artificial flavors. Think of them as an easy dog meal “bonus” treat, not a full meal replacement. They’re perfect when you want something more substantial than a tiny biscuit, but still wholesome and simple.
Are Beef & Vegetable Chew Sticks safe for all dogs and how many can I give?
These chew sticks use generally safe, dog-friendly ingredients and work for most healthy adult dogs. That said, every dog is different, so introduce them slowly and watch for any signs of tummy upset or itching. As a guideline, treats (including these chew sticks) should make up no more than 10% of your dog’s daily calories. For many medium dogs, 1 chew stick per day is plenty; small dogs may only need half, and large dogs might handle 1–2 depending on their diet and activity. When in doubt, double-check with your vet, especially for dogs with pancreatitis, sensitive stomachs, or weight issues.
Can I change the vegetables or flour in these Beef & Vegetable Chew Sticks?
You can safely swap the carrot and green beans for other dog-friendly veggies like peas, finely grated zucchini, or cooked sweet potato. Just be sure to avoid onions, garlic, leeks, or anything seasoned with those—**they’re toxic to dogs.** Keep vegetables cooked until tender and finely chopped or grated so they’re easy to digest. For the flour, you can use whole wheat flour or oat flour, and many sensitive pups do well with oat flour. If you change the veggies or flour, you may need to add a bit more or less flour to get a dough that’s soft but not sticky.
Recipe

Homemade Beef and Vegetable Chew Sticks for Dogs
Ingredients
Method
- Preheat the oven to 350°F and line a baking sheet with parchment paper.
- Place the cooked, cooled, and crumbled lean ground beef in a large mixing bowl.
- Add the grated carrot and chopped, steamed green beans to the bowl and stir to combine.
- Mix in the rolled oats and ground flaxseed until they are evenly distributed.
- Add the egg and olive oil or melted coconut oil, then stir or use clean hands to form a cohesive, slightly sticky mixture.
- Add 1 cup of the flour to the bowl and mix well, then continue adding the remaining flour a tablespoon at a time until the dough is firm, pliable, and no longer overly sticky.
- Lightly flour your work surface and your hands, then divide the dough into 12 equal portions.
- Roll each portion into a rope about 1/2 inch thick and 5 to 6 inches long, pressing gently to smooth any cracks.
- Arrange the formed chew sticks on the prepared baking sheet, leaving a little space between each one.
- Bake for 25 to 30 minutes, until the sticks are firm to the touch and lightly golden on the edges.
- Turn off the oven and, if you want a drier, chewier texture, leave the sticks inside with the door slightly ajar for an additional 10 to 15 minutes.
- Transfer the chew sticks to a wire rack and let them cool completely before serving to your dog.
Notes
- For dogs sensitive to wheat, use oat flour in place of whole wheat flour.
- Store cooled chew sticks in an airtight container in the refrigerator for up to 6 days.
- For longer storage, freeze the cooled sticks in a single layer, then transfer to a freezer bag for up to 2 months.
- Always break treats into smaller pieces for small dogs or dogs who tend to gulp their food.


