
The Memory Behind This Treat
The very first batch of these Sweet Peanut Butter Pupcakes happened completely by accident on a snowy February afternoon. I was in the kitchen making my own Valentine’s cupcakes when Max trotted in, parked himself in front of the oven, and gave me that soulful “Where’s mine?” stare only a Labrador can pull off. I flipped over the store-bought dog treats I had on hand, read the ingredient list, and felt my heart drop at all the fillers and mystery words. So I pushed my chocolate chips aside, grabbed the whole wheat flour, unsweetened applesauce, and Max’s favorite peanut butter, and started testing a dog-safe batter instead. The whole kitchen smelled like warm peanut butter and cinnamon, and Max did not move from his post until the timer beeped.
When those first Sweet Peanut Butter Pupcakes cooled enough to touch, I added a tiny swirl of plain yogurt on top and slid one onto a plate just for him. Max took one sniff, then one gentle bite, and suddenly crumbs and frosting were everywhere—tail thumping against the cabinets like a drum. I remember thinking how easy it was to turn simple pantry ingredients into an “I love you” treat for my dog, without any added sugar, salt, or weird preservatives. That moment turned into a little Valentine’s Day tradition: I make a small batch of homemade dog treats, we skip the store-bought stuff, and we celebrate with something warm, fresh, and made just for him. Every time I whisk that egg with the applesauce and peanut butter now, I’m right back in that cozy kitchen, with snow outside, oven on, and Max waiting patiently for his special Valentine.
How To Make It (Mix & Ingredients)
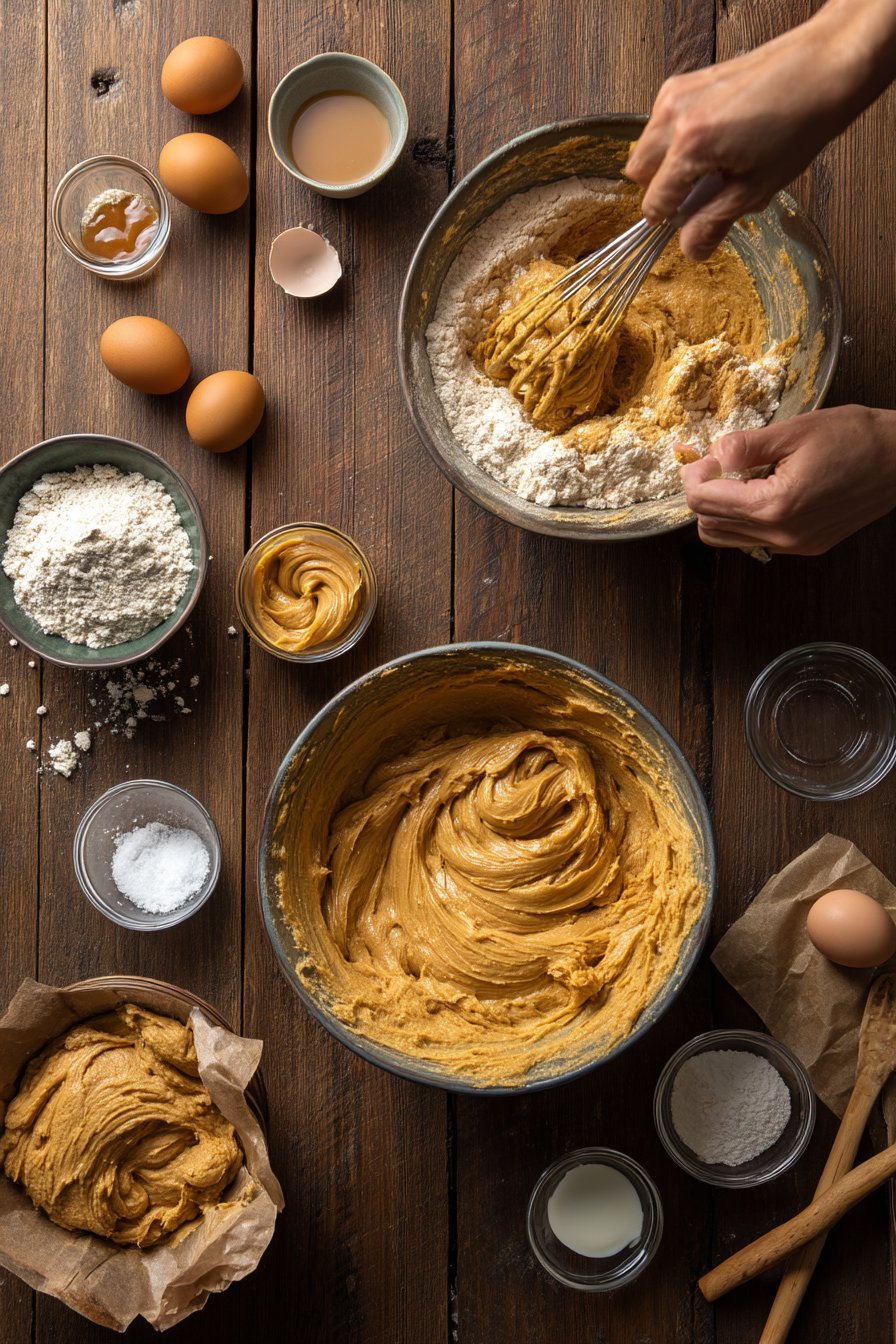
To make these Sweet Peanut Butter Pupcakes, start by whisking together your dry ingredients in a medium bowl: whole wheat flour (or oat flour if your pup is sensitive to gluten), baking powder, and cinnamon. Use a spoon or small whisk and mix until everything looks evenly speckled with cinnamon and there are no clumps of baking powder. This helps your batter rise evenly so every pupcake bakes up light and tender instead of dense and gummy.
Instructions Process of Sweet Peanut Butter Pupcakes
In a separate bowl, combine the wet ingredients: unsweetened applesauce, xylitol-free peanut butter, plain yogurt, water, and the egg. Stir well until the peanut butter loosens and everything turns into a smooth, creamy mixture—almost like a thin pancake batter. Slowly pour the dry ingredients into the wet, stirring with a spatula or wooden spoon just until there are no dry streaks of flour left. The batter will be a little thick, more like muffin batter than cake batter, and that’s exactly what you want for dog-friendly, slightly hearty Sweet Peanut Butter Pupcakes.From here, you can portion the batter into a lined muffin tin, filling each cup about 2/3 full so they have room to rise. If you’ve ever made other homemade dog treats, you’ll notice how much simpler this batter is—no fancy tools needed, just bowls and a spoon. If the batter looks too thick to scoop, add 1 tablespoon of water at a time until it loosens slightly, but avoid overmixing so the pupcakes stay soft and tender for your Valentine’s Day pup-date.
Make-Ahead & Storage
One of my favorite things about these Sweet Peanut Butter Pupcakes is how easy they are to make ahead for a special Valentine’s walk, party, or photo session. You can bake the full batch, let them cool completely on a wire rack, and then store them in an airtight container at room temperature for up to 3 days. If your kitchen runs warm or humid, I recommend sliding the container into the fridge instead, where they’ll stay fresh for about 5–6 days. Just remember that the yogurt and applesauce in the batter add moisture, so they won’t keep as long as crunchy homemade dog treats. Before serving a chilled pupcake, let it sit on the counter for 5–10 minutes so the texture softens and the peanut butter aroma really pops for your pup.
If you want to really get ahead, these Sweet Peanut Butter Pupcakes freeze beautifully. Once the pupcakes cool, place them on a baking sheet in a single layer and freeze until solid, then transfer them to a freezer bag or container, removing as much air as possible. Label with the date, and aim to use them within 2 months for best flavor and texture. To thaw, move a pupcake from the freezer to the fridge the night before, or let it rest on the counter for about 30–40 minutes. You can even freeze them unfrosted and add a quick swirl of yogurt or a smear of peanut butter right before serving, just like I do when I’m prepping a batch alongside my banana oat dog muffins for the week. However you store them, always give each pupcake a quick sniff and visual check before treating your dog—if anything smells off or looks moldy, toss it and whip up a fresh batch instead.
Best Ingredients & Party Variations
When you’re baking Sweet Peanut Butter Pupcakes, the ingredients you choose matter just as much as the love you stir in. I like to stick with xylitol-free peanut butter, smooth and unsalted if possible, and I always double-check the label before I scoop. Whole wheat flour gives the batter a hearty, wholesome base, but if your pup is sensitive to wheat, finely ground oat flour works beautifully and keeps the crumb soft. Unsweetened applesauce adds gentle sweetness and moisture without any added sugar, and cinnamon (in small amounts) smells amazing and feels like a cozy hug in the oven. For that creamy, dog-safe “frosting,” plain unsweetened yogurt—Greek or regular—pipes nicely with a small baggie and holds up well in the fridge for a day or two.
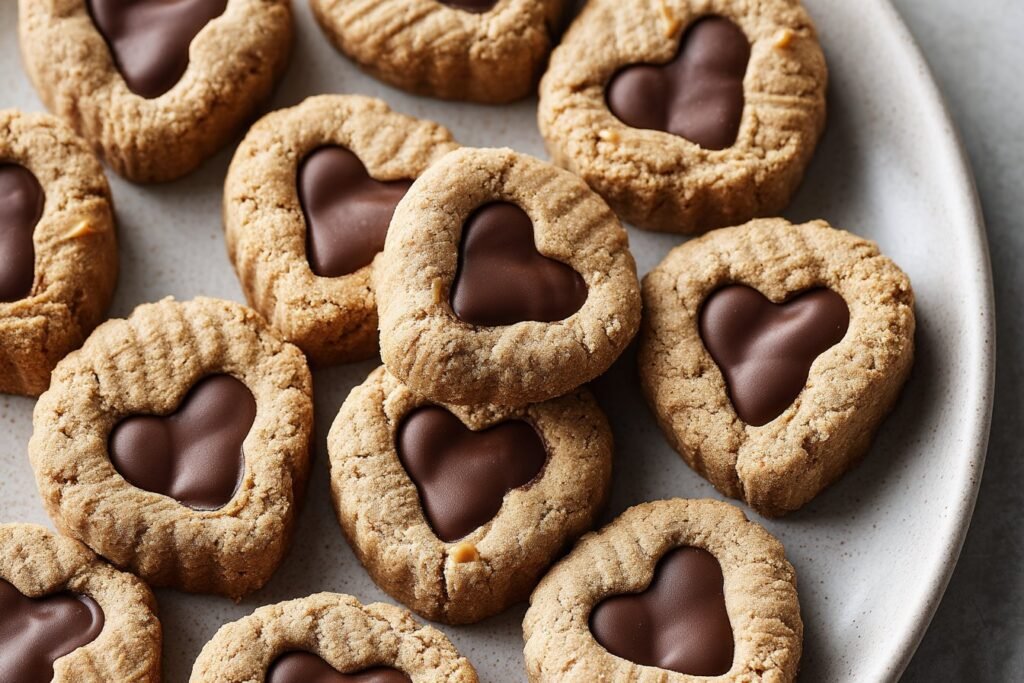
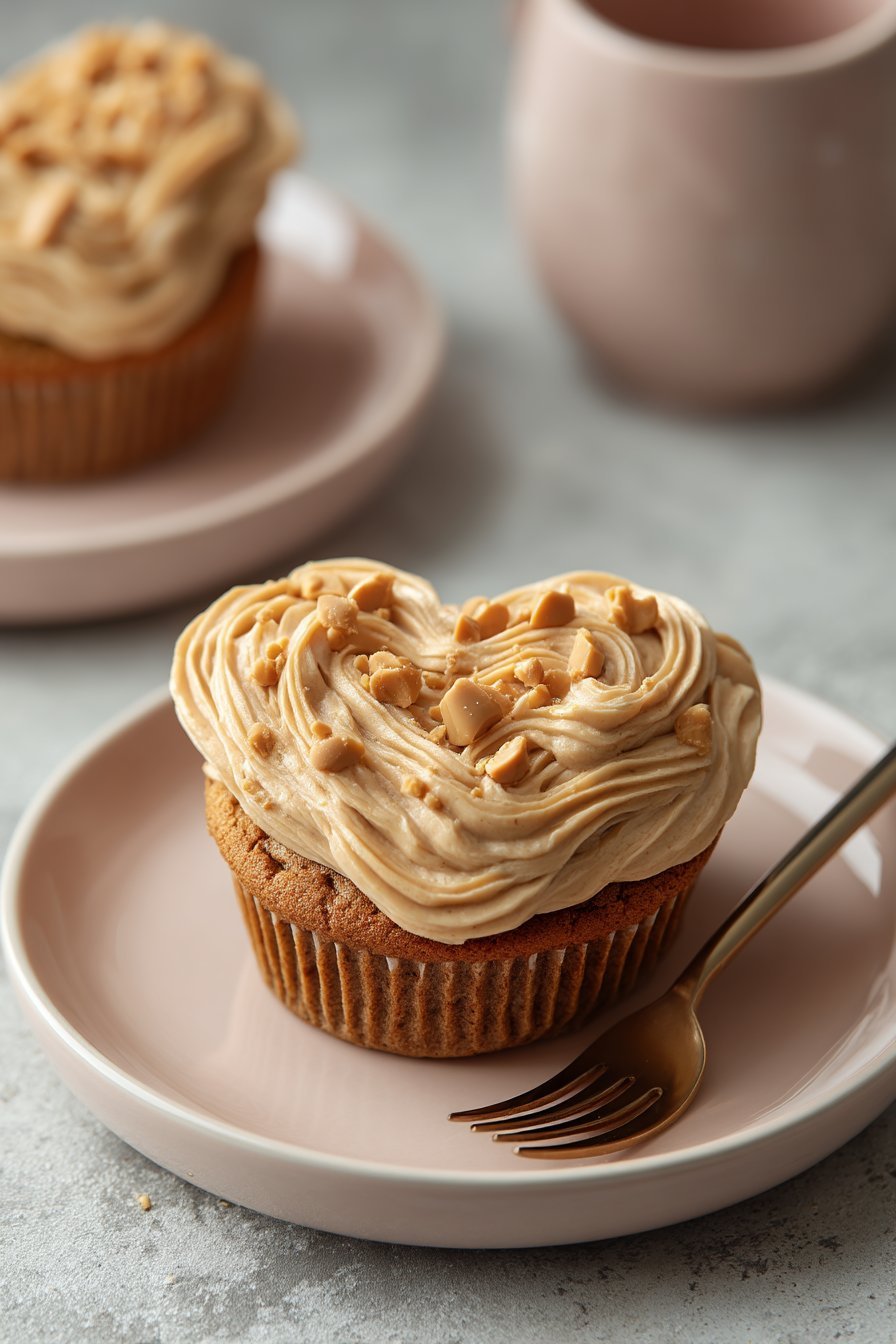
For Valentine’s Day, you can easily turn these Sweet Peanut Butter Pupcakes into a full-on doggy date or party. Bake the batter in mini silicone heart molds for little bite-size treats, or bake as usual and top each cooled pupcake with a swirl of yogurt and a few blueberries or a tiny dog biscuit “garnish.” If your dog loves fruit, finely chopped strawberries make a cute pink topping, just like in my strawberry yogurt pup treats, and they look wonderfully festive. Hosting more than one pup? Set up a pupcake bar with plain, cooled pupcakes and small bowls of toppings: a spoonful of peanut butter, a sprinkle of crushed dog cookies, or a few banana slices. For birthdays or Gotcha Days, stack 2 pupcakes with a thin layer of peanut butter in between for a little “layer cake,” then let your dog demolish it while you snap all the photos.
Serving of Sweet Peanut Butter Pupcakes
Conclusion
Valentine’s Day doesn’t need fancy reservations or perfect table settings to feel special—sometimes it’s just you, your pup, and a batch of homemade love cooling on the counter. These sweet peanut butter pupcakes are more than a cute holiday treat; they’re a way to slow down, laugh at the batter on your sleeve, and make your dog’s tail wag so hard their whole body joins in. Moments like that are what our days are really made of.
I hope this recipe becomes part of your little traditions—maybe a yearly Valentine’s bake, a “Gotcha Day” celebration, or just a rainy-day project where you let your pup lick the spoon (after you’re done, of course!). If you’ve been wanting to try easy dog meals or healthy dog food recipes but felt a bit nervous, let this be the one you say “yes” to. You truly can’t mess it up—your dog only tastes the love.
For more delicious recipes like this, follow us on social media!
What makes these Sweet Peanut Butter Pupcakes dog-safe?
Sweet Peanut Butter Pupcakes use simple, dog-friendly ingredients like whole wheat or oat flour, unsweetened applesauce, plain yogurt, and xylitol-free peanut butter. There’s no chocolate, artificial sweeteners, or heavy sugar like in human cupcakes. **Always double-check your peanut butter label to be sure it’s xylitol-free**, as xylitol is extremely toxic to dogs. If your pup has known allergies (like eggs, wheat, or dairy), talk with your vet before baking. You can often swap to oat flour, lactose-free yogurt, or an egg replacer to better match your dog’s needs.
Can I adjust Sweet Peanut Butter Pupcakes for dogs with sensitivities?
Yes, this recipe is very flexible for pups with mild food sensitivities. You can use oat flour instead of whole wheat flour for a gentle, gluten-free option. If your dog can’t handle dairy, choose lactose-free or dairy-free dog-safe yogurt, or simply leave the frosting-style topping off. For egg sensitivities, try using 3 tablespoons of unsweetened applesauce or a “flax egg” (1 tablespoon ground flax + 3 tablespoons water, rested) per egg. Always introduce the new version slowly and watch for any tummy upset or itching.
How should I store and serve leftover Sweet Peanut Butter Pupcakes?
Store fully cooled pupcakes in an airtight container in the fridge for up to 4 days. For longer storage, freeze them on a tray, then transfer to a freezer bag for up to 2 months. Thaw 1 pupcake at a time in the fridge or at room temperature before serving. Because these are treats, serve them in moderation—usually 1 pupcake for medium to large dogs, and half for small dogs. Reduce your dog’s regular treat portions on pupcake days to avoid extra calories sneaking in.
Recipe

Sweet Peanut Butter Pupcakes
Ingredients
Method
- Preheat the oven to 350°F and line a 6-cup muffin tin with paper liners or lightly grease each cup.
- In a medium bowl, whisk together the whole wheat flour, baking powder, and cinnamon until well combined.
- In a separate bowl, add the applesauce, peanut butter, yogurt, water, and egg, then whisk until the mixture is smooth and creamy.
- Pour the dry ingredients into the wet ingredients and stir with a spatula or wooden spoon just until no dry flour remains; do not overmix.
- Divide the batter evenly among the 6 muffin cups, filling each about 2/3 full.
- Bake for 16–18 minutes, or until the pupcakes are set and a toothpick inserted in the center comes out clean.
- Remove the pupcakes from the oven and let them cool in the pan for 5 minutes, then transfer to a wire rack to cool completely before serving to your dog.
- Optionally, top each cooled pupcake with a small spoonful of plain unsweetened yogurt right before serving.
Notes
- Let pupcakes cool completely before serving to avoid burning your dog’s mouth.
- Store cooled pupcakes in an airtight container at room temperature up to 3 days, or in the refrigerator up to 6 days.
- For longer storage, freeze cooled pupcakes in an airtight container for up to 2 months and thaw in the refrigerator before serving.
- Serve pupcakes as an occasional treat and adjust your dog’s regular meals to prevent overfeeding.


