
Why These Frozen Pear & Yogurt Paws Are Worth Making
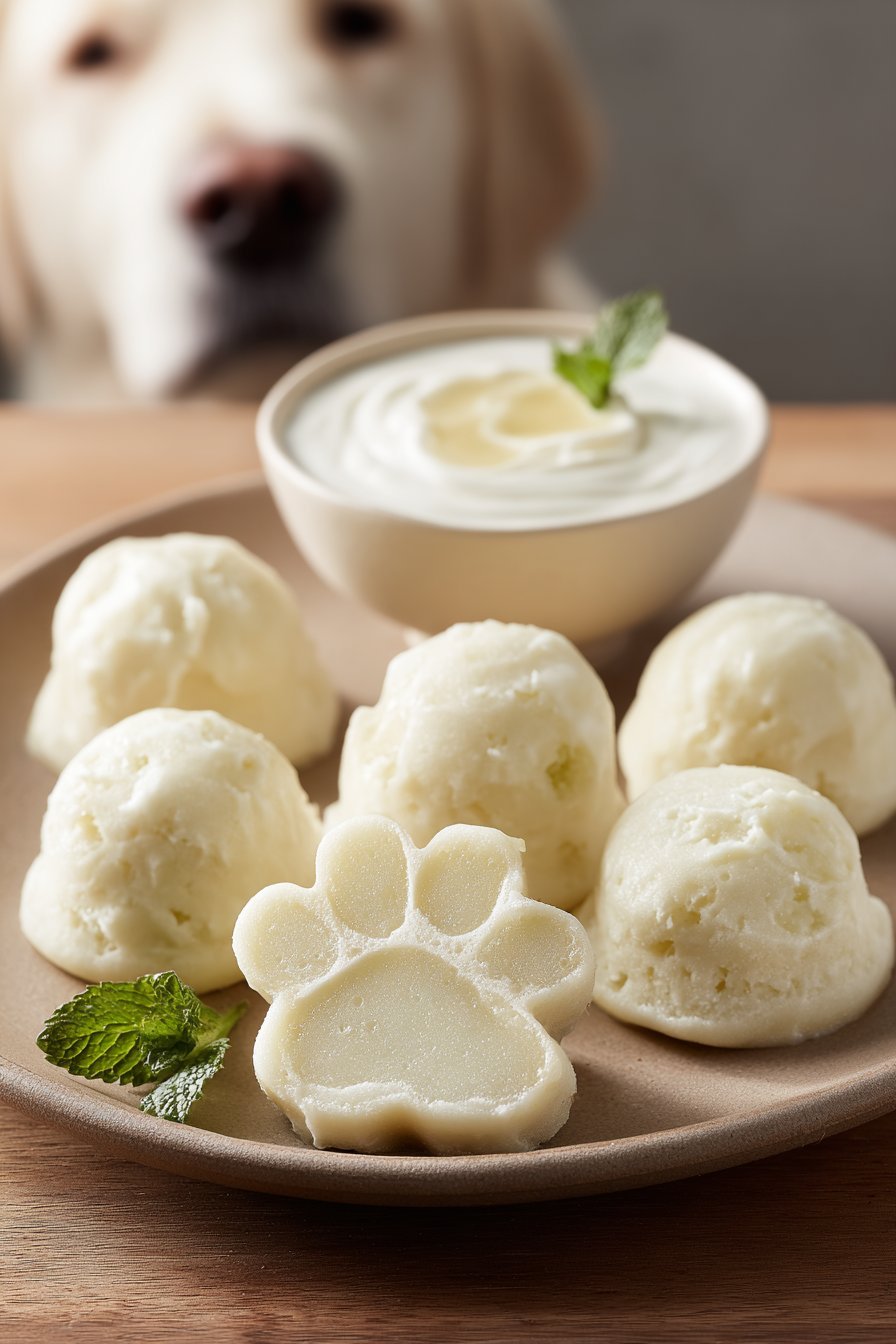
These Frozen Pear & Yogurt Paws work so well because they combine prebiotic fiber from pears with probiotic cultures from plain yogurt in a form that’s easy on your dog’s stomach. The blended pear adds natural sweetness and soluble fiber that can help support healthy digestion without loading your pup up with added sugars or artificial flavors. The yogurt brings in beneficial bacteria that may help balance the gut, especially for dogs who occasionally deal with sensitive tummies or loose stools. Because the mixture gets blended until completely smooth, even dogs who tend to gulp their treats get a consistent texture in every bite. And since everything goes straight into silicone molds and then into the freezer, you don’t need any fancy techniques—just a blender and a little patience.
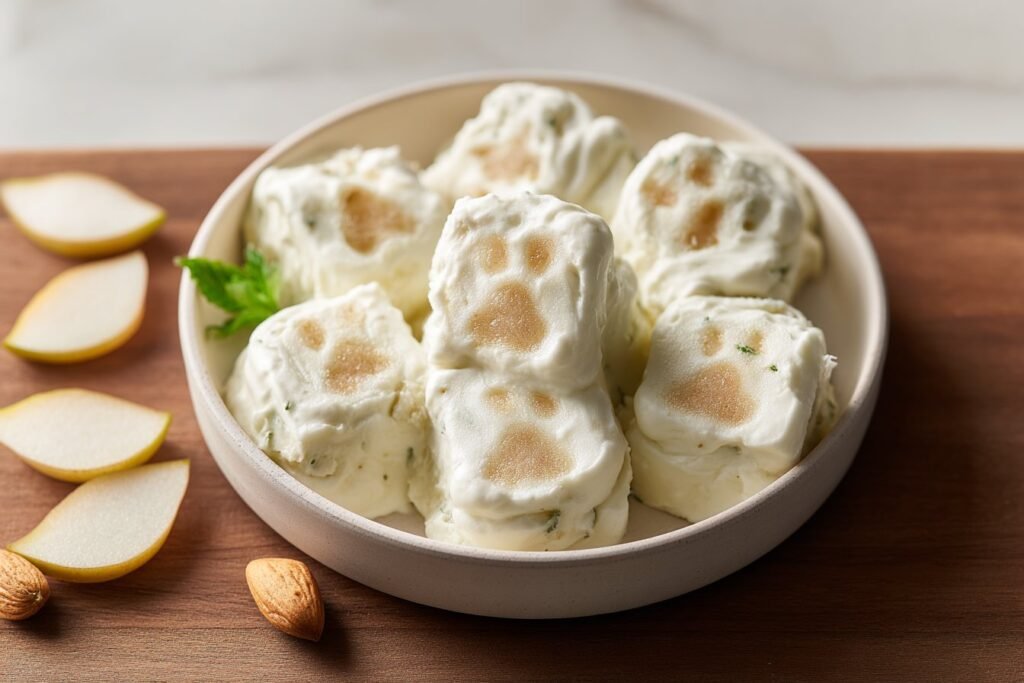
The recipe also keeps things wonderfully simple, which is a big part of why it works in real-life, busy-dog-parent kitchens. With only two main ingredients, it’s easy to scan the yogurt label, confirm there’s no xylitol, no added sugar, and no artificial sweeteners, and feel good about what you’re giving your dog. The thick, smoothie-like consistency poured into paw-shaped or simple cube molds freezes into a firm but lickable texture that helps cool your pup down on hot days. Each piece is naturally portionable, so you can offer one small cube to a Chihuahua or a few to a Lab without overdoing the calories. It’s one of those easy dog meals–style treats that feels a little “fancy,” but you can whip it up in about the time it takes your coffee to brew.
Finally, these Frozen Pear & Yogurt Paws give you lots of built-in control and flexibility for your pup’s needs. You can start with a single small paw to see how your dog handles the dairy, then adjust the serving size as you go. If your dog is very sensitive, you can swap in a lactose-free or goat milk yogurt and still enjoy the cool, gut-friendly benefits. Because each treat is only about 30 calories, you can use them as a light afternoon snack, a reward after a walk, or as a soothing cool-down after playtime. They tuck perfectly into a freezer container and keep well for weeks, which means you can make a batch once and have a stash of homemade dog treats ready whenever you see those hopeful eyes by the freezer door.
How to Make These Cooling Frozen Pear & Yogurt Paws
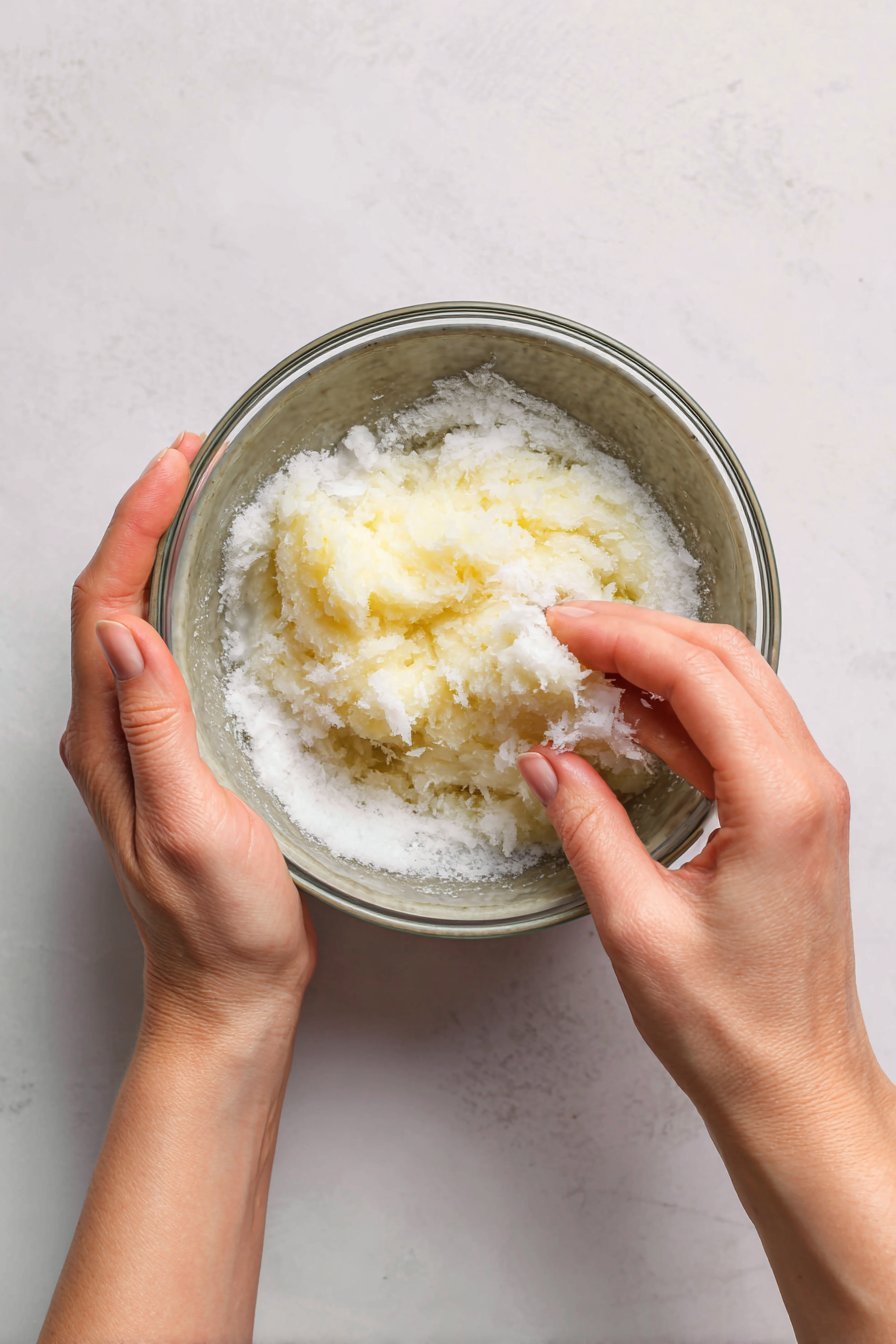
Start by giving your pear a really good rinse, then core it and remove every last seed—pear seeds, like apple seeds, are not safe for dogs. I like to keep the skin on for extra fiber, but you can peel it if your pup has a sensitive tummy. Chop the pear into small chunks so they’re easy on your blender. Add the pear pieces and plain, unsweetened yogurt (no flavors, no sweeteners, and never xylitol) to your blender, then blend on high until the mixture looks like a thick, creamy smoothie with no visible bits of fruit. If it seems too thick to pour, you can add a tablespoon of water at a time until it loosens up slightly.
Once your mixture is smooth, place your silicone paw molds on a small baking sheet or cutting board—this keeps everything steady when you move it to the freezer. Carefully pour or spoon the pear-yogurt blend into each mold, leaving just a tiny bit of space at the top so it doesn’t overflow as it freezes. Slide the tray into the freezer and let your Frozen Pear & Yogurt Paws set for about 4–6 hours, or until they’re completely solid. When they’re frozen through, pop them out of the molds; the texture should be firm but melt quickly once your dog starts licking. Serve 1–3 paws depending on your dog’s size and store the rest in a freezer-safe container or bag for up to 3 months—perfect for rotating with your other easy dog meals and homemade dog treats on hot afternoons.
Time, Prep, and Storage Plan for Your Frozen Pear & Yogurt Paws
You only need about 10 minutes of hands-on time to get these Frozen Pear & Yogurt Paws ready, which makes them perfect for busy dog parents. I like to wash, core, and chop the pear while my blender jug is already on the counter, then toss in the plain yogurt and blitz until smooth. Once you pour the mixture into your silicone paw molds (or any small ice cube tray), the real “work” is just waiting: plan on 4–6 hours of freezer time for them to set fully. I usually make these in the evening while I’m cleaning up after dinner so they’re frozen solid and ready for Max by the next afternoon. Yield-wise, this batch makes about 16 small treats, so you’ll have plenty to last several days depending on your dog’s size and daily serving.
After you pop the Frozen Pear & Yogurt Paws out of the molds, store them in a labeled, freezer-safe container or zip-top bag to prevent freezer burn and keep odors out. They stay fresh for up to 3 months in the freezer, but I recommend using them within 4–6 weeks for the best flavor and texture. If you like to rotate homemade dog treats, you can easily keep a few kinds on hand at once—these pair nicely with simple fruit-based recipes like banana yogurt bites or pumpkin pup pops. Always serve them straight from the freezer and avoid letting them sit out too long, or they’ll melt into a pear-yogurt puddle on your floor (Max doesn’t mind that, but your kitchen might). Remember to stick to the suggested serving sizes by weight and treat these as a supplement to a balanced diet, not a replacement meal.
Flexible Options and Serving Notes for Frozen Pear & Yogurt Paws
One of my favorite things about these Frozen Pear & Yogurt Paws is how easy they are to adjust for your dog’s size, tummy, and preferences. For small dogs, I like to use mini paw or bone molds so each portion stays close to a single “bite”—that way you’re not trying to chop a rock-hard frozen treat into pieces on the counter. If your pup has a sensitive stomach or you’re just starting with yogurt, you can dilute the mixture with a little water or lactose-free dog-safe yogurt to make the treats gentler. You can even freeze some in a shallow tray and break it into flakes as a light topper over their regular food instead of serving a full paw. Think of the basic mix like a “base recipe” you can scale up or down depending on how your dog does with new homemade dog treats.
For serving, treat these like a cool bonus, not a meal. I like to give Max his Frozen Pear & Yogurt Paws after a walk in warm weather—he comes in panting, hears the freezer open, and suddenly sits like the world’s most polite gentleman. Follow the suggested daily portions from the main recipe, and always start at the low end if your dog is new to dairy. Let your dog lick the treat from your hand or serve it in a bowl so it doesn’t slide across the floor like a tiny ice hockey puck. If your dog tends to gulp treats, you can blend the same mixture, chill it in the fridge instead, and offer a spoonful as a soft, cold snack instead of frozen. And just like with any easy dog meals, watch for any signs of gas, loose stool, or itchiness, and dial back or stop if something seems off—your pup’s belly comfort always comes first.
Serving of Frozen Pear & Yogurt Paws
Conclusion
Making these Frozen Pear & Yogurt Paws isn’t just about cooling your dog down on a warm day—it’s about slowing down, having fun in the kitchen, and creating a small ritual you both can look forward to. I still smile when I remember the first time Max tried one; he did that happy little head tilt, then immediately sat for another. Moments like that remind me why I started making easy dog meals in the first place: simple, wholesome ingredients, and a whole lot of love.
I hope this recipe becomes part of your own cozy memories too—maybe it’s a weekend project with the kids, a special post-walk treat, or a sweet way to celebrate your pup’s “gotcha day.” Pulling a tray of homemade dog treats from the freezer and seeing that excited wag is such a rewarding feeling, and you absolutely deserve to enjoy it.
Give this recipe a try, tweak it to fit your dog’s tastes, and let it become your own little tradition.
For more delicious recipes like this, follow us on social media!
Instructions Process of Frozen Pear & Yogurt Paws
What exactly are Frozen Pear & Yogurt Paws for dogs?
Frozen Pear & Yogurt Paws are simple homemade dog treats made by blending fresh pear with plain, unsweetened yogurt and freezing the mixture in small molds. The pear brings natural sweetness and prebiotic fiber, while the yogurt adds probiotics that may support a healthy gut. They’re cool, creamy, and perfect for warm days or as a light, soothing snack after a walk. Think of them as a tiny, dog-safe frozen yogurt bite instead of a heavy treat. You can easily adjust the size of the paws to match your dog’s weight and calorie needs.
Are Frozen Pear & Yogurt Paws safe for all dogs, including sensitive stomachs?
Most healthy dogs can enjoy these treats in moderation, but every pup is different. Pear and yogurt are generally gentle ingredients, yet the natural sugar in fruit and the lactose in yogurt can bother some sensitive tummies. Always start with a very small paw and watch for loose stool, gas, or discomfort. If your dog has a history of pancreatitis, chronic diarrhea, or food allergies, talk with your vet before adding any new treats. **Never use yogurt that contains xylitol or added sweeteners, as they can be extremely dangerous for dogs.**
What kind of yogurt and pear should I use in Frozen Pear & Yogurt Paws?
Choose plain, unsweetened yogurt with live and active cultures; Greek or regular both work, as long as there are no added flavors, sugars, or sweeteners. Carefully read the ingredient list and skip anything with xylitol, artificial sweeteners, or sugar alcohols. For the pear, use ripe, fresh pears, washed well, cored completely, and with all seeds and stem removed, since seeds can be unsafe. You may leave the skin on for extra fiber if your dog tolerates it. Avoid canned pears in syrup because they contain unnecessary sugar and sometimes additives.
Recipe

Frozen Pear & Yogurt Paws
Ingredients
Method
- Wash the pear thoroughly under running water.
- Core the pear completely, making sure to remove all seeds, then chop the pear into small chunks.
- Add the pear chunks and the plain yogurt to a blender.
- Blend on high until the mixture is completely smooth and has a thick, creamy, smoothie-like consistency.
- Place silicone paw molds or an ice cube tray on a small baking sheet or cutting board for stability.
- Carefully pour or spoon the pear-yogurt mixture into the molds, leaving a small space at the top of each cavity.
- Transfer the filled molds to the freezer and freeze for 4 hours, or until the treats are completely solid.
- Once frozen, pop the treats out of the molds.
- Serve immediately and store any remaining treats in a freezer-safe bag or container for up to 3 months.
Notes
- Start with a small serving to make sure your dog tolerates dairy well.
- Serving suggestions: small dogs (under 20 lb): 1 small paw or cube per day; medium dogs (20–50 lb): 2 per day; large dogs (over 50 lb): 3 per day.
- These treats are a supplement to a balanced diet and not a meal replacement.


