Why This One Delivers
This Butterfinger Puppy Chow hits that rare sweet spot where nostalgic comfort meets pure convenience. You only need a handful of pantry staples plus Butterfinger candy bars, and you can go from zero to snack bowl in about 10 minutes. The cereal stays crisp under a thin, glossy coat of chocolate and peanut butter, so every piece holds its shape instead of turning soggy or clumpy. Because you simply melt, stir, and toss, you get a big party sized batch with almost no effort, no oven, and very little mess. It is the kind of recipe you can pull together during halftime, during homework time, or right before guests walk in the door.
Flavor wise, Butterfinger Puppy Chow earns its name in every single bite. The semi sweet chocolate and creamy peanut butter give you that classic puppy chow base, while the crushed Butterfinger bars add an extra hit of crisp, salty sweet crunch that stands out. Using both finely crushed and roughly chopped pieces gives you layers of texture, so some bites are extra chocolatey and others surprise you with bigger shards of candy. A light shower of powdered sugar finishes it off, which keeps the pieces from sticking and adds that familiar, snack bowl look everyone recognizes. If you already love easy, shareable treats like classic muddy buddies or simple bar desserts, this Butterfinger Puppy Chow is the fun, candy loaded upgrade that will quietly replace your old go to recipe.
From Prep to Finish
You will love how quickly this Butterfinger Puppy Chow comes together on a busy day. Start by pouring your Rice Chex into the biggest mixing bowl you own, so you have plenty of room to stir without sending cereal flying across the counter. While that waits, combine the chocolate chips, creamy peanut butter, and salted butter in a microwave safe bowl. One solid minute in the microwave usually melts everything, but if you still see a few chips, stir patiently until the mixture turns silky and smooth. I imagine it the way Max eyes my bowl of popcorn on movie night, totally focused and hoping for a piece.
Once your chocolate and peanut butter mixture looks glossy, stir in the vanilla so every bite of Butterfinger Puppy Chow has that warm aroma. Drizzle the mixture slowly over the cereal instead of dumping it in one spot, then gently fold with a spatula from the bottom of the bowl up. You want every piece coated, but not crushed, so think firm but kind, the same way you might guide an excited pup on a leash. When the cereal looks evenly chocolatey, sprinkle in the 15 crushed Butterfinger bars, then give it one last gentle stir so the candy bits cling to the coating. Finally, add the sifted powdered sugar in stages, tossing until the pieces are separate and powdery, with a few chopped Butterfinger pieces saved to sprinkle on top right before serving. It is just like finishing a batch of homemade puppy treats, such as my peanut butter dog cookies, where a simple garnish makes the whole bowl look extra special.
Timing, Storage, and Make-Ahead
Butterfinger Puppy Chow is a speedster in the kitchen, so you can easily make it during a busy weekday or just before guests arrive. Plan for about 10 minutes of real hands on time, plus another 20 to 30 minutes for the chocolate and peanut butter coating to set on the cereal. Spread the mix on a parchment lined baking sheet if you want it to cool faster and avoid big clumps. You will know it is ready when the pieces look dry and powdery, not glossy or sticky. If you are making this for a party or to share after a dog park meetup, you can comfortably prepare it in the morning for the evening.
For storage, transfer your Butterfinger Puppy Chow to an airtight container once it is completely cool. It keeps well at room temperature for 4 to 5 days, as long as your kitchen is not very hot. In a warm climate or during summer, you can refrigerate it, but let it sit at room temperature for 10 to 15 minutes before serving so the texture softens slightly. You can also freeze portions in zip top bags for up to 2 months, which is helpful if you like to keep a stash for unexpected guests or game nights. Label the bags with the date and amount, just like you would for a batch of homemade dog treats, so you always know what you are grabbing.
If you want to make Butterfinger Puppy Chow ahead for holidays or gift bags, mix and cool it completely, then portion it into sealed containers or jars up to 3 days in advance. Leave the garnish pieces of chopped Butterfinger off until the day you plan to serve or gift, so they stay vivid and crunchy on top. I love pairing a bowl of this with a small batch of my homemade dog treats for Max, so both humans and pups have something special to snack on without sharing across the species line.
Ingredient swaps and serving options
You can keep all the joy of Butterfinger Puppy Chow even if you need to tweak the ingredients a bit. If you are out of Rice Chex, use Corn Chex or plain wheat squares for a slightly heartier crunch, or even broken rice cakes for a more delicate texture. For the chocolate, semisweet chips give a nice balance, but you can use milk chocolate for a sweeter treat or dark chocolate for a richer, slightly less sugary bite. If you do not have pure vanilla bean paste, regular vanilla bean paste works just fine, just use the same amount and stir it in once the chocolate mixture turns smooth and glossy.
Peanut butter carries that classic Butterfinger flavor, but you can sub creamy almond butter if you need a peanut free version, just know the taste will be softer and a bit less nostalgic. Crunchy peanut butter also works if you like extra texture, just melt it the same way and keep stirring until everything smooths out. For the Butterfinger pieces, swap in chopped peanut butter cups or chocolate covered pretzels if you forgot to grab the candy bars, or mix Butterfinger with a handful of mini chocolate chips or roasted peanuts for more variety.
Serving wise, I like to portion this Butterfinger Puppy Chow into small bowls or cups so no one is tempted to hover over the big mixing bowl, it disappears faster than you expect. For parties, scoop it into clear treat bags, then tie them and pile them in a big bowl so guests can grab and go, just like I do with my fan favorite cookie party mix or holiday snack mix. At home, serve a modest scoop in a bowl, then tuck the rest in an airtight container out of reach, the best way to enjoy an indulgent treat like this is a little at a time with a big glass of cold milk nearby.
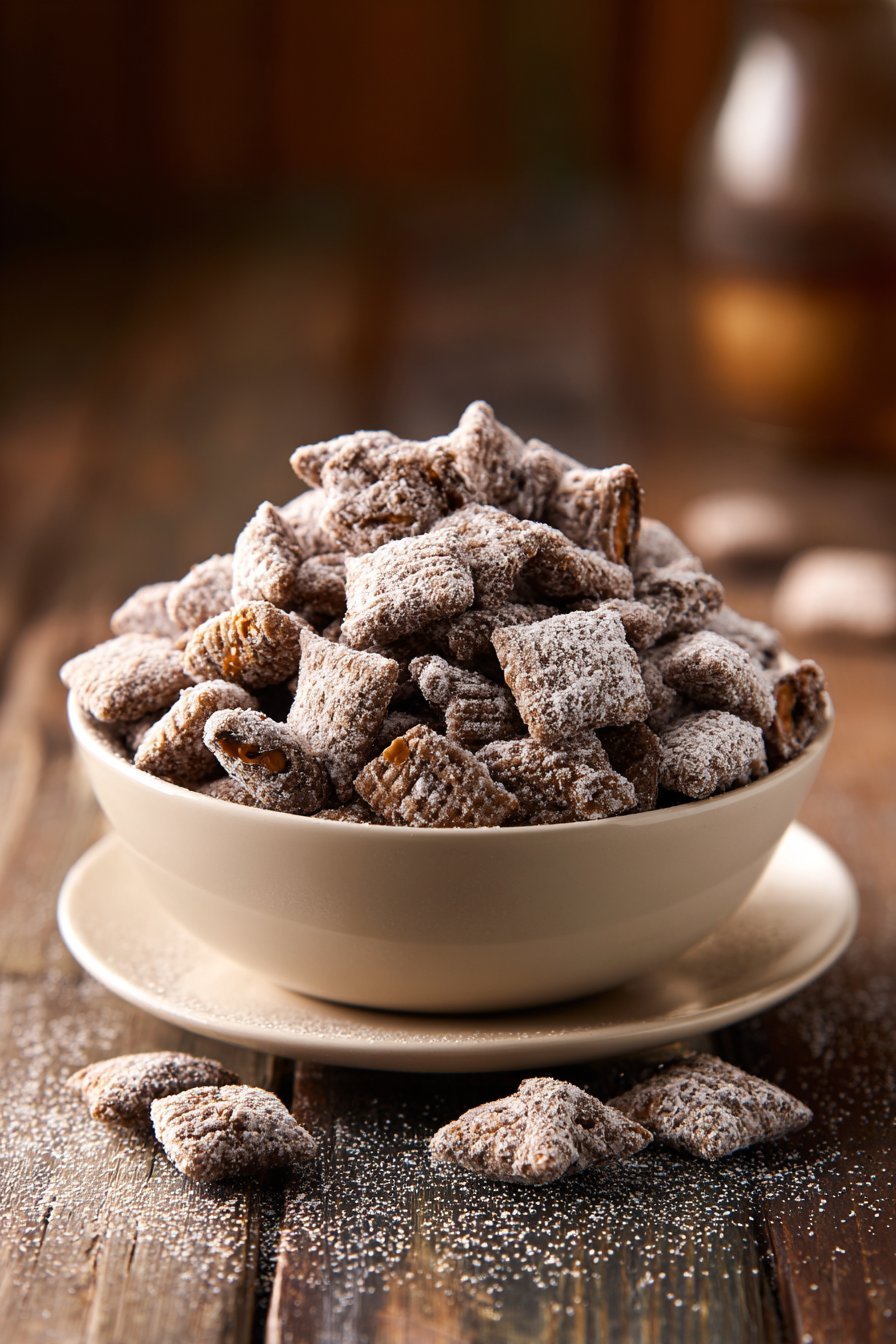
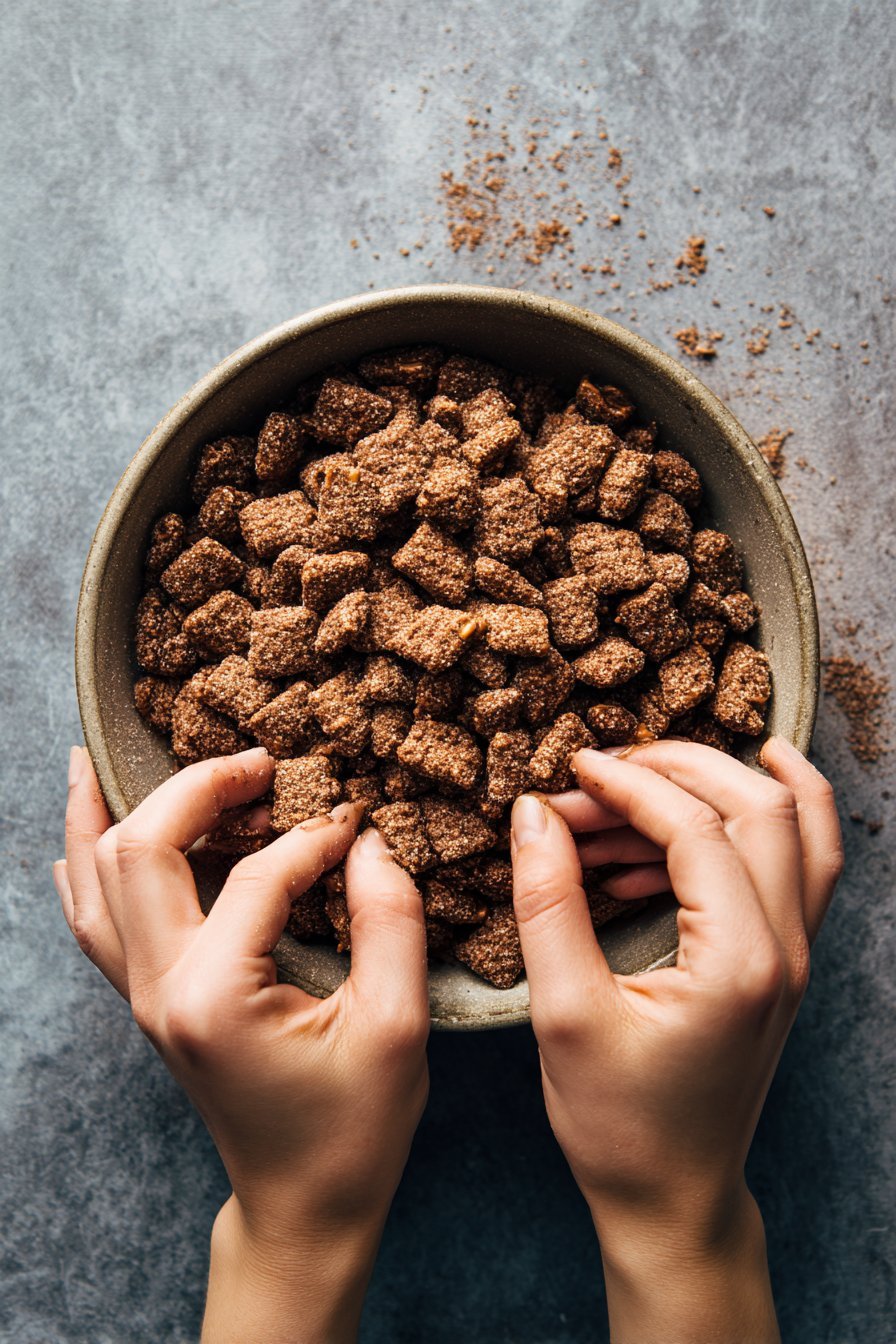
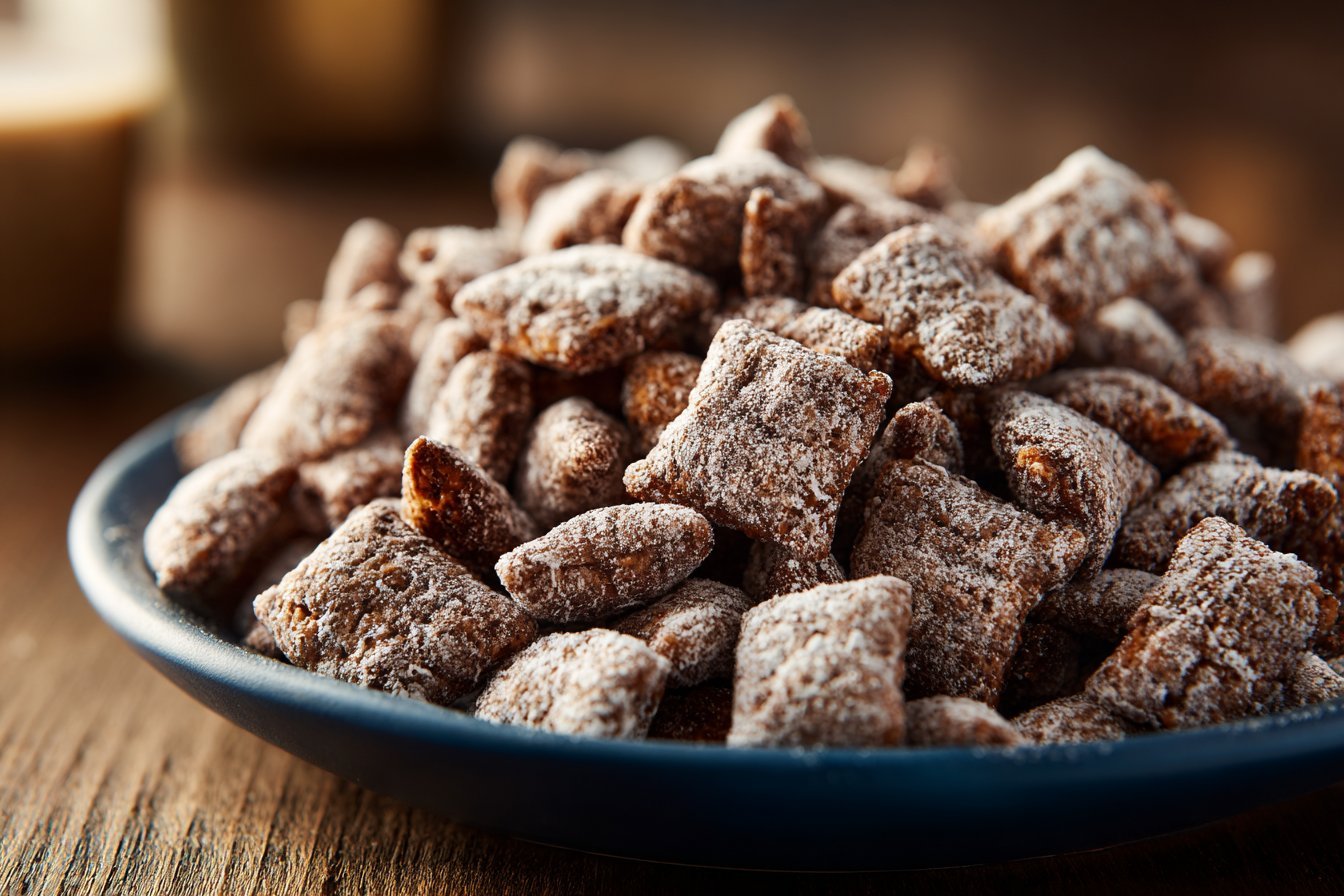
Serving of Butterfinger Puppy Chow
Conclusion
When you take a few quiet minutes to stir up this sweet, crunchy mix, you are not just making a snack, you are creating a cozy little ritual. I still smile every time I remember the first time I set a big bowl of this out on the coffee table. Friends reached in, laughed, shared stories, and the dogs curled up at our feet hoping for their own special bites and snuggles. Simple treats like this have a way of turning ordinary afternoons into memory making moments.
I hope this no bake adventure inspires you to keep playing in the kitchen, trying new twists, and finding excuses for just one more movie night or game night. Pull out your biggest bowl, invite your favorite humans, grab the pup for couch cuddle duty, and give this Butterfinger Puppy Chow a try. You might just start a new family tradition.
For more delicious recipes like this, follow us on Facebook and Pinterest!
Instructions Process of Butterfinger Puppy Chow
Recipe
Butterfinger Puppy Chow
Ingredients
Method
- Add the Rice Chex cereal to an extra large mixing bowl and set aside.
- Place the chocolate chips, peanut butter, and salted butter in a microwave safe bowl.
- Microwave on high for 1 minute, then stir until the mixture is completely melted and smooth.
- Stir in the vanilla until fully combined.
- Slowly drizzle the warm chocolate peanut butter mixture over the cereal.
- Gently fold the cereal with a spatula until all pieces are evenly coated without crushing them.
- Add the 15 crushed Butterfinger bars to the coated cereal and gently stir to distribute the candy pieces.
- Sprinkle the sifted powdered sugar over the cereal mixture in 2 to 3 additions, gently tossing between each addition until all pieces are well coated and no longer sticky.
- Spread the Butterfinger Puppy Chow in a single layer on a parchment lined baking sheet and let it cool until dry to the touch.
- Transfer the cooled puppy chow to a serving bowl and sprinkle the remaining 3 roughly chopped Butterfinger bars over the top before serving.
Notes
- For longer storage, refrigerate for up to 1 week or freeze in zip top bags for up to 2 months.
- Let chilled or frozen portions sit at room temperature for 10 to 15 minutes before serving.
- Use creamy peanut butter, not natural peanut butter that separates, for the best texture and coating.
- Do not serve this snack to dogs; it is a humans only treat due to chocolate and candy.