What Makes This Fruit Roll-Ups Recipe Truly Trustworthy
When I call this a reliable Fruit Roll-Ups recipe, I mean it behaves the same way every single time in a real home kitchen—not just in a studio. The low-and-slow temperature and pre-thickening on the stove do a lot of the heavy lifting for you, so you are much less likely to end up with burnt edges and a gooey middle. The 15–20 minute simmer helps evaporate excess water before the oven ever gets involved, so your fruit purée dries more evenly. Using a simple 1/8-inch thickness guideline (rather than vague “thin layer” language) also gives you a clear, repeatable target, whether you’re making this for curious kids or in a batch as part of your easy dog meals prep.
This Fruit Roll-Ups method is also flexible where it matters and precise where it counts. You get clear options for sweeteners—honey, sugar, or a sugar substitute—without changing the basic technique or drying time ranges. Lemon juice isn’t just for flavor; its acidity helps balance sweetness, keeps colors brighter, and provides a tiny bit of preservative power, which is something I rely on in many of my homemade dog treats too. The wide 4–6 hour baking window might sound loose, but that’s exactly what home ovens need; you’ll learn to test doneness by feel (no sticky spots when you press gently in the center) instead of depending on the clock alone. With just fruit, sweetener, and lemon, you avoid mystery ingredients, and you can easily adapt this base to other healthy snack recipes you already love.
The Method (Step-by-Step)
Start by getting your fruit completely prepped, because smooth purée is the secret to even, chewy Fruit Roll-Ups rather than patchy, brittle ones. Wash everything thoroughly, then peel and chop any fruit with tougher skins, like mango or kiwi, into small chunks so your blender doesn’t struggle. Blend until the mixture looks like a thick smoothie with no visible bits—if you see seeds or tough fibers and want a super-smooth finish, you can quickly strain it, but it’s optional. Add the honey (or your sweetener of choice) and lemon juice, then blend again so everything is fully combined and you don’t get tangy pockets in some bites and overly sweet spots in others.
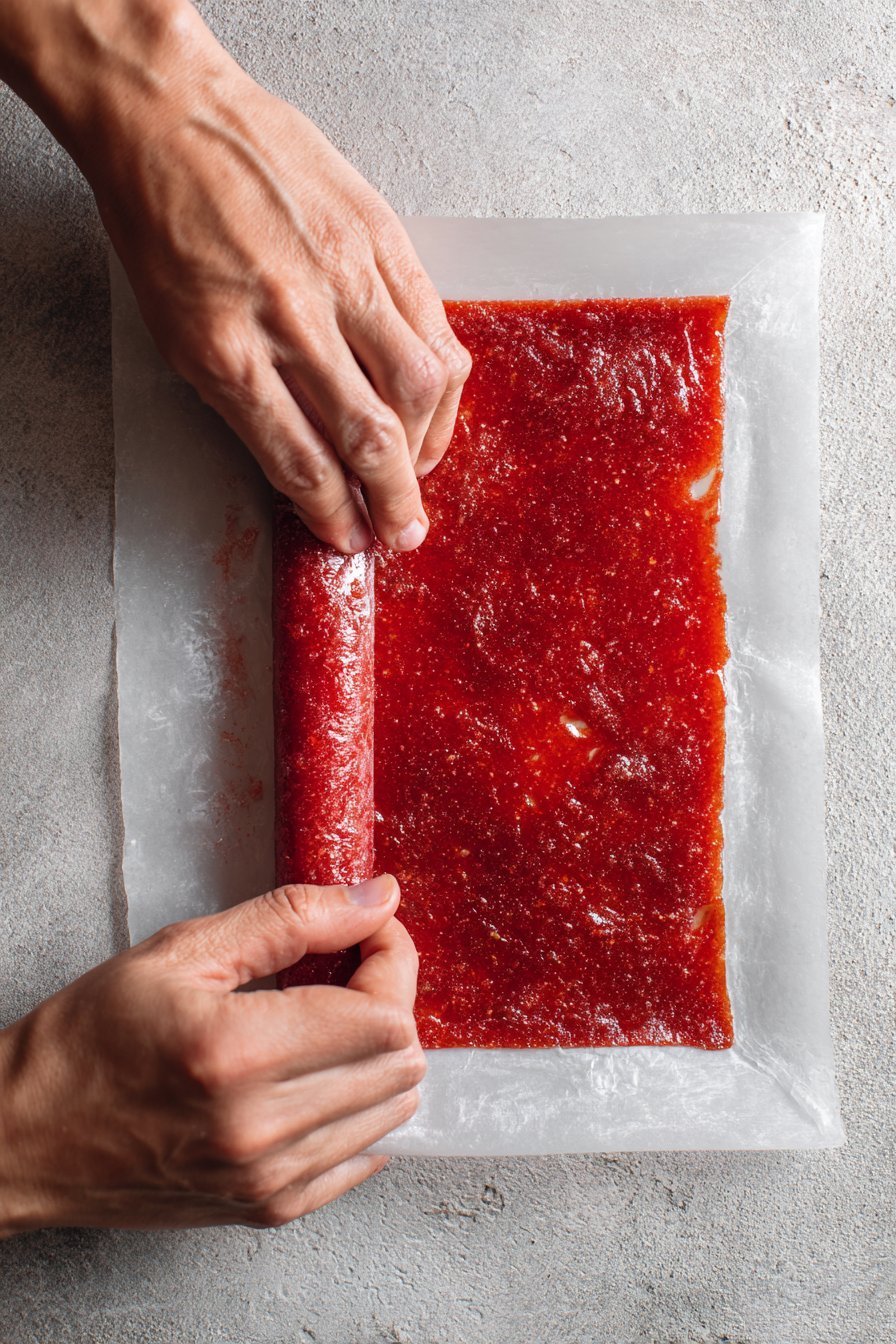
Next, move to the stove so you can cook the purée down and speed up the drying time. Pour it into a medium saucepan and set it over low heat; you want gentle bubbling, not a fast boil that can scorch the bottom. Stir every minute or so for about 15–20 minutes, until the mixture thickens slightly and leaves a light trail when you run a spatula through it. Line two baking sheets with parchment or silicone mats, then pour the warm mixture on top, dividing it evenly. Use an offset spatula or the back of a spoon to spread it into a thin, even layer—around 3 mm (about 1/8 inch) thick—making sure the edges aren’t thinner than the center, since they cook faster and can become brittle.
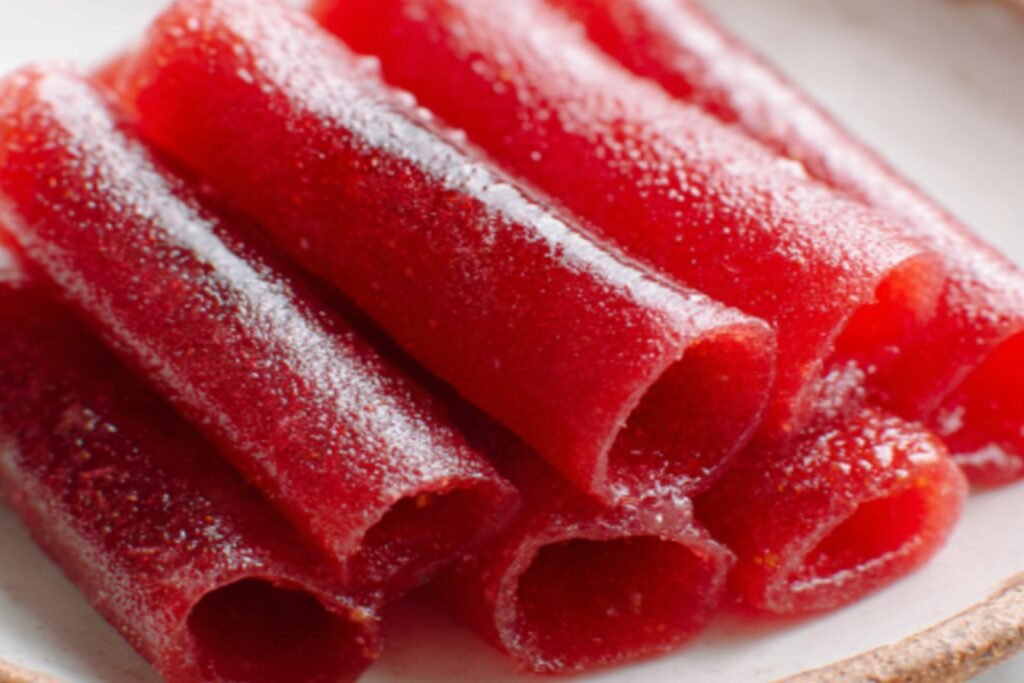
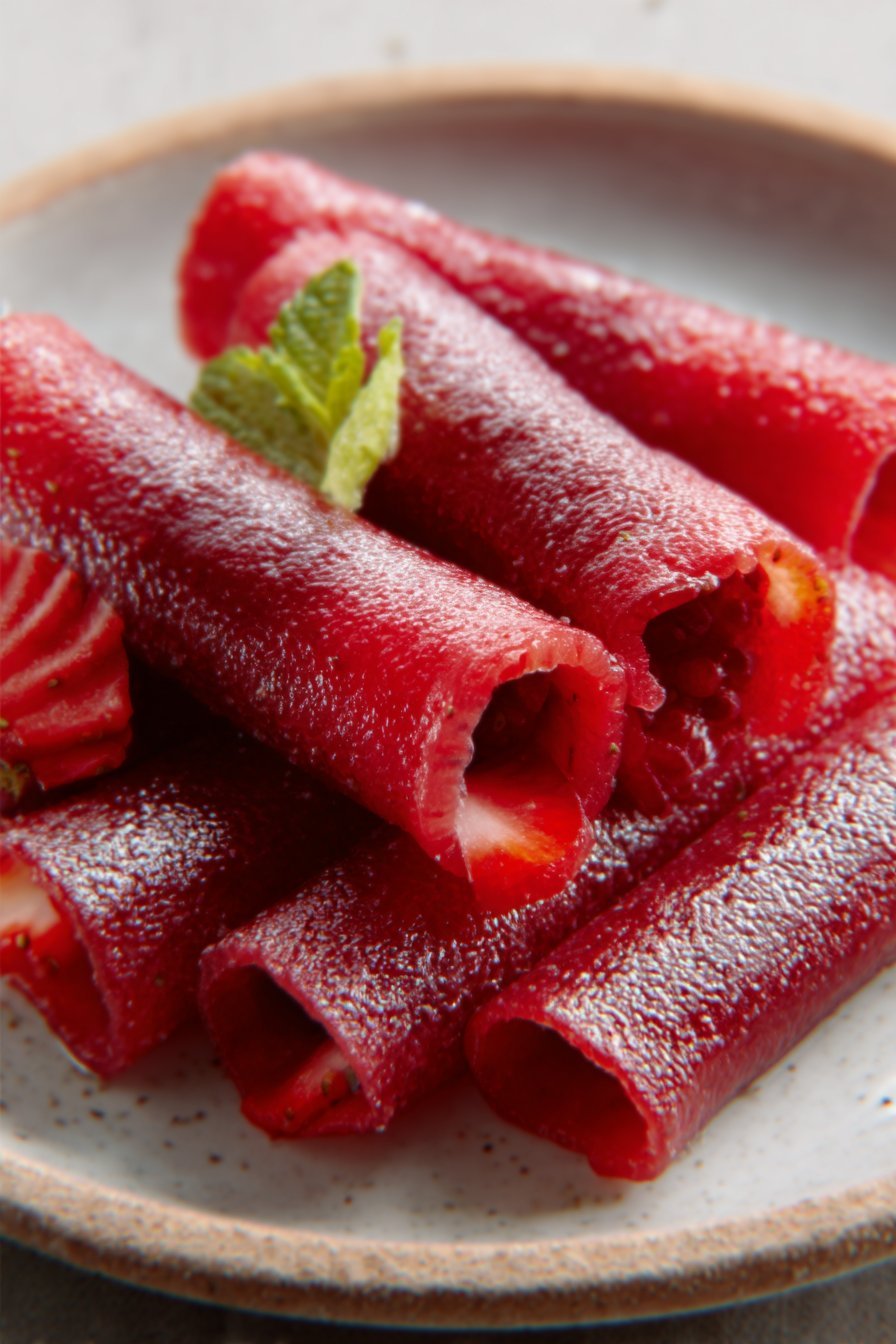
Finally, slide the trays into a low oven set to 170°F (75°C) and let the Fruit Roll-Ups slowly dry out for 4–6 hours. You’re aiming for a texture that feels dry to the touch but still bends without cracking; if it’s sticky in the middle, give it another 30–60 minutes. Let the sheets cool completely on the trays so they firm up, then use kitchen scissors or a sharp knife to cut long strips, paper and all. Roll them up tightly, then store in an airtight container at room temperature for about a week, or freeze if you want to batch prep snacks. If you’re also a dog parent like me and browsing my healthy dog food recipes, keep these human treats separate—your pup will be happier with homemade dog treats made just for them!
Keep It Fresh: Timing and Storage
Once your Fruit Roll-Ups are cooled, the clock for freshness really starts. For best flavor and texture, store them at room temperature in an airtight container or jar for up to 7–10 days. Make sure they’re completely dry before you store them—if a strip feels even slightly tacky, let it air-dry on the counter for another hour or two. To prevent sticking, you can leave them rolled with the parchment or place small pieces of parchment between layers. Keep the container in a cool, dry pantry away from direct sunlight or the roll-ups can get too soft and sticky.
If you want to batch-prep Fruit Roll-Ups for busy weeks, the freezer is your best friend. Roll them up with the parchment, place the rolls in a zip-top freezer bag, press out extra air, and freeze for up to 2–3 months. They thaw quickly—about 10–15 minutes on the counter—so they’re an easy grab-and-go snack for lunchboxes or after-school treats. If you live in a humid climate, you might notice a little condensation after thawing; just let the Fruit Roll-Ups sit unwrapped on a plate for a few minutes and they’ll dry back out. And as with any homemade snack, label the bag with the date so you know exactly how long they’ve been stored and when it’s time to make a fresh batch.
Swaps, Variations, and Serving Ideas for Fun Fruit Roll-Ups
One of my favorite things about these Fruit Roll-Ups is how easy they are to customize. You can mix fruits like strawberries and mango, or go tropical with pineapple and banana—just keep the total amount of fruit the same so they dry evenly. If your fruit is naturally very sweet (like ripe peaches), you can cut the honey in half or skip it, then add a little extra lemon juice to keep that bright flavor. Want a softer, more flexible texture? Spread the purée just a touch thicker. For a punchier taste without extra sugar, blend in a dash of pure vanilla bean paste or a pinch of cinnamon.
You can also treat these Fruit Roll-Ups like a base for snack “crafting.” Cut them into bite-size squares and stack them with thin apple slices or banana coins for quick energy bites. For school lunches, roll them up with a strip of whole wheat tortilla and a smear of nut butter for a no-mess treat that feels like candy but fuels like real food. At home, I love slicing them into thin ribbons and tossing them over a bowl of plain yogurt instead of sugary granola. If you’re already exploring more homemade snack ideas, these pair beautifully with simple baked crisps or even soft oatmeal bars as part of a healthier snack tray.
Serving of Fruit Roll-Ups
Conclusion
As I watched Max gently crunch his way through these homemade Fruit Roll-Ups, I realized it wasn’t just about the treat itself—it was about the moment. The few quiet minutes in the kitchen, the sweet smell of baked fruit, the excited paws tapping on the floor as he waited… those tiny rituals add up to something really special. When you make these at home, you’re not just following a recipe, you’re creating a memory with your dog right by your side.
I love knowing exactly what goes into Max’s snacks, and I’m guessing you feel the same about your pup. Making this simple recipe can turn an ordinary afternoon into a cozy, tail-wagging event—whether you’re baking alone, with your kids, or with a friend who’s just as dog-obsessed as we are. Lay out your ingredients, preheat that oven, and let yourself enjoy the process.
Give this recipe a try, watch your dog’s reaction, and let yourself soak in that happy, wiggly gratitude.
For more delicious recipes like this, follow us on social media!
Instructions Process of Fruit Roll-Ups
What fruits are best for homemade Fruit Roll-Ups?
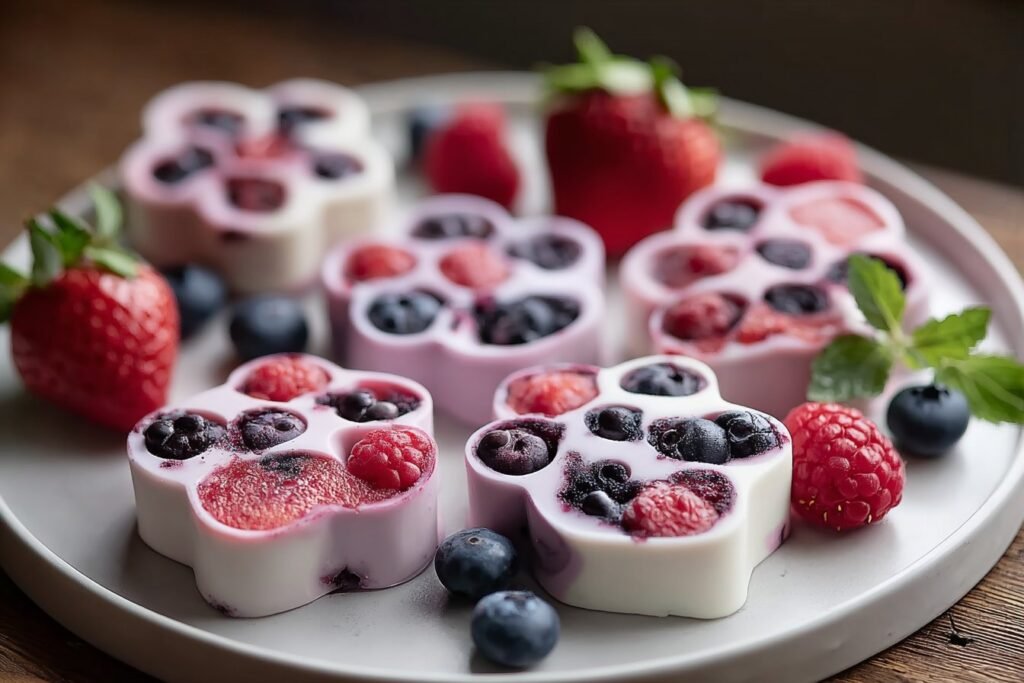
You can use almost any naturally sweet, soft fruit for healthy Fruit Roll-Ups, like strawberries, mangoes, peaches, bananas, and blueberries. For a vet-inspired twist, choose lower-acid fruits if your dog has a sensitive stomach and avoid grapes or raisins, which are **toxic to dogs**. Apples and pears work beautifully if you cook them down until very soft before blending. Always wash fruit thoroughly, remove any pits, tough cores, and stems, and peel if the skin is waxy or bitter. If you share a tiny taste with your pup, stick to dog-safe fruits like apple, blueberry, or banana, and offer just a small nibble.
Can I adjust the sweetness in Fruit Roll-Ups?
Yes, you can absolutely adjust the sweetness level in your Fruit Roll-Ups. Start with the lower end of the honey (or sugar) range, then taste the fruit purée before baking and add more only if needed. Super-ripe fruit and naturally sweet varieties like mango or banana usually need very little added sweetener. Skip artificial sweeteners and **never use xylitol—it’s extremely toxic to dogs**, even in tiny amounts. If you plan to share a small strip with your dog, keep the batch on the lightly sweetened side to be gentler on their belly.
How should I store homemade Fruit Roll-Ups for freshness?
Once your Fruit Roll-Ups cool completely, keep them rolled in the parchment and place them in an airtight container. Store them at room temperature for up to 1 week in a cool, dry spot away from direct sunlight. For longer keeping, refrigerate them for up to 1 month; they’ll stay chewy and flavorful. You can also freeze rolls in a freezer bag for 2–3 months, then thaw at room temperature before eating. If you’re sharing tiny pieces with your dog, fresh storage helps avoid any mold or spoilage that could upset their stomach.
Recipe

Fruit Roll-Ups
Ingredients
Method
- Preheat the oven to 170°F and line 2 baking sheets with parchment paper or silicone baking mats.
- Add the chopped fruit to a blender and blend until completely smooth.
- Add the honey and lemon juice to the blender and blend again until fully combined.
- Pour the fruit mixture into a medium saucepan and set over low heat.
- Simmer for 15 to 20 minutes, stirring often, until slightly thickened and the spoon leaves a light trail in the mixture.
- Divide the warm mixture evenly between the prepared baking sheets.
- Use an offset spatula or the back of a spoon to spread the mixture into an even 1/8-inch thick layer, making sure the edges are not thinner than the center.
- Place the baking sheets in the oven and bake for 4 to 6 hours, rotating pans as needed, until the surface is dry to the touch and no longer sticky.
- Remove from the oven and let the sheets cool completely on the pans.
- Once cooled, use kitchen scissors or a sharp knife to cut the fruit leather into long strips with the parchment attached.
- Roll each strip up tightly and store in an airtight container at room temperature.
Notes
- Make sure the purée is very smooth for even drying and a chewy texture.
- If the center is still sticky after 4 hours, continue baking in 30-minute increments until fully dry.
- Store roll-ups at room temperature for up to 7 to 10 days, or freeze for longer storage.