The Memory Behind This Treat
The very first batch of these Sourdough Dog Treats happened by complete accident—on a Sunday morning when my sourdough starter was overflowing on the counter and Max was staring at me with that “I’m obviously starving” Labrador drama. I had just fed my starter, scraped out a full cup of unfed discard, and was about to pour it down the sink when Max’s nose went into overdrive. He sniffed the mixing bowl, sneezed once (flour dust everywhere), and then sat down with that polite-but-urgent tail thump that always means, “I know you’re baking. I would like to participate.” Instead of tossing the discard, I grabbed some whole wheat flour, oats, and a spoonful of peanut butter and decided my starter could pay a little “dog tax.”
As the first tray baked, the kitchen filled with that warm, tangy, toasty smell you only get from sourdough, mixed with the rich nuttiness of peanut butter. Max parked himself right in front of the oven, ears perked every time the timer beeped for another check. When the treats finally cooled enough to handle, I broke off a small corner, made him sit (he pretended this was extremely difficult), and watched him crunch into it with total focus. That batch turned into our “baking day ritual”: I feed the starter, save a cup of discard, and Max knows Sourdough Dog Treats are on the way. Now, whenever I bake a loaf for the humans, I almost always make a small dog-sized batch on the side—because in this house, the starter doesn’t just feed the family, it feeds the fur baby too.
How To Make It (Mix & Ingredients)
To make these Sourdough Dog Treats, start by grabbing a medium mixing bowl and your unfed sourdough starter straight from the fridge. Add the starter, whole wheat flour, rolled oats, egg, and peanut butter to the bowl. If you’re using the pumpkin or applesauce, mix that in now too—it adds a little extra moisture and flavor. Stir with a sturdy spoon until the dough starts to come together, then switch to your hands and knead in the bowl or on a lightly floured counter. You’re aiming for a firm, workable dough that holds its shape, not something soft like cookie dough. If it’s sticky, sprinkle in a teaspoon of flour at a time; if it’s crumbly, add a tiny splash of water.
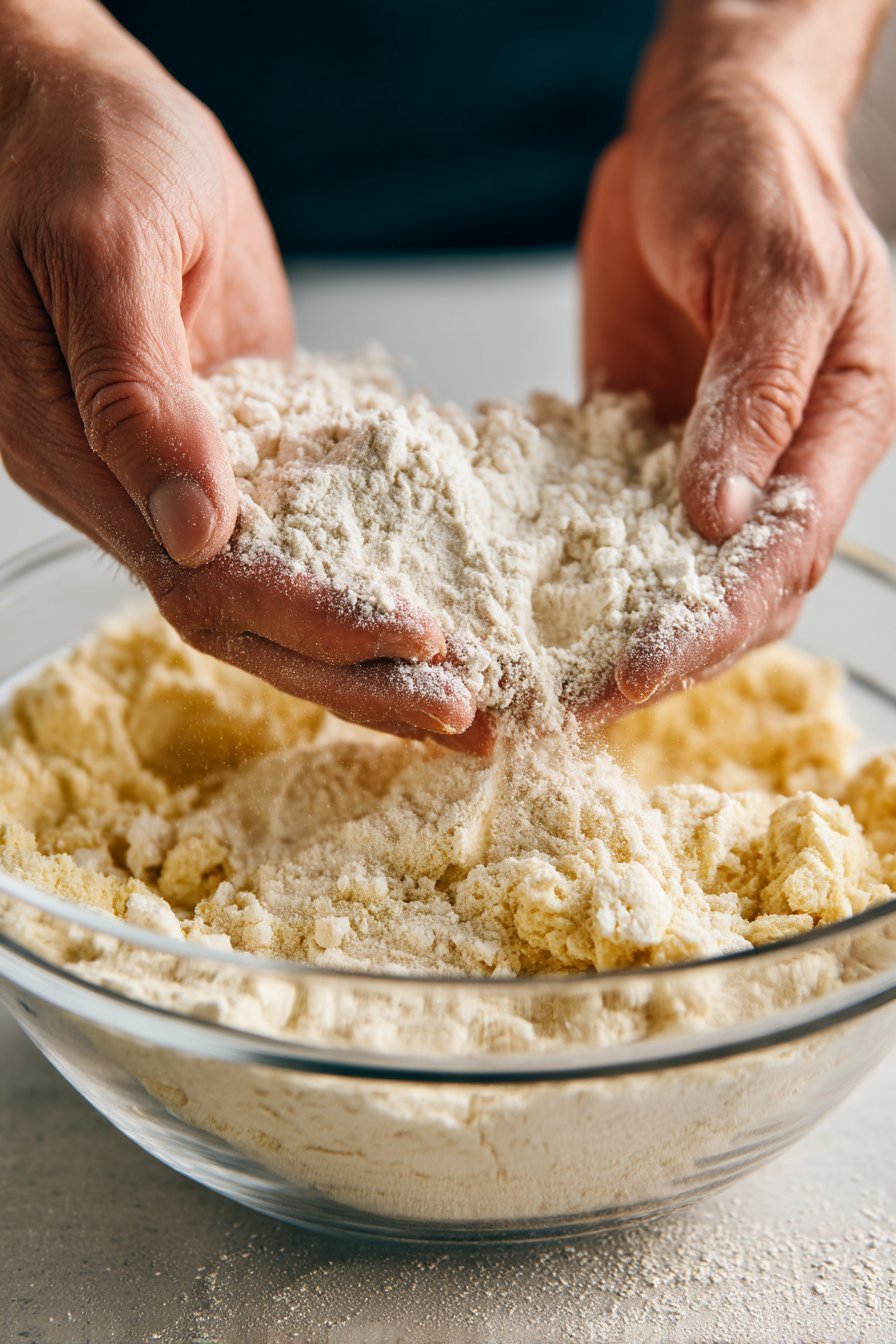
Instructions Process of Sourdough Dog Treats
Once your dough is smooth and cohesive, dust your counter with a bit more whole wheat flour and roll the dough out to about ¼-inch thick. This thickness gives you a good balance: crunchy enough for a satisfying chew, but not so hard that most dogs struggle to bite it. Use small cookie cutters or a knife to cut into bite-sized pieces that fit your dog’s size—tiny bones for toy breeds, bigger squares for larger pups. Transfer the pieces to a parchment-lined baking sheet, leaving just a little space between them (they don’t spread much). At this point, you can press in a few extra rolled oats on top for texture. Bake until the treats are firm and lightly golden on the bottom, then cool completely before serving so those eager noses don’t get burned.
Make-Ahead & Storage
One of my favorite things about these Sourdough Dog Treats is how well they fit into real-life, busy dog parent schedules. You can easily double the batch on a Sunday, bake once, and have healthy dog treats ready for walks and training all week. After the treats cool completely on the baking sheet, transfer them to an airtight container or glass jar. At normal room temperature (around 68–72°F), they stay fresh for about 5–7 days. If your kitchen runs warm or humid, store them in the fridge instead to keep them from getting soft or stale too quickly.
For longer storage, the freezer is your best friend. Place the cooled Sourdough Dog Treats in a single layer on a baking sheet and freeze until solid, then toss them into a labeled freezer bag. They’ll keep well for up to 2 months without losing too much crunch. You can serve them frozen on hot days for a cooling chew, or let a few sit on the counter for 10–15 minutes to soften slightly before offering them to your pup. If you bake them a little longer for extra dryness (think crisp and firm, not burnt), they’ll usually last longer on the counter and in the freezer.
If you like to use treats in puzzle feeders or as hike snacks, prepping in advance makes life easier. I suggest baking one batch of Sourdough Dog Treats, then dividing them: some go into a jar on the counter for daily rewards, some go in a baggie in your hiking pack, and the rest stay in the freezer as backup. Always check for any signs of mold or off smells before serving, especially with homemade dog treats that don’t have preservatives. And remember, even though these are part of your healthy dog food recipes collection, treats should stay in that 10% of daily calories zone—Max would absolutely vote for 90%, but he’s not in charge of the menu.
Best Ingredients & Party Variations
When you bake Sourdough Dog Treats, quality ingredients matter just as much as they do in your own snacks. I like to start with an unfed sourdough starter that’s at peak tanginess but not overly acidic—if it smells harsh or like nail polish remover, refresh it once or twice before baking. Whole wheat flour brings more fiber and nutrients than white flour, and rolled oats add gentle texture that’s easy on tummies. For the egg, choose fresh and well within date; it helps bind everything and adds protein. And always, always use plain, natural peanut butter with no added sugar and absolutely no xylitol—read that label every time, even on brands you “know.”
You can turn these simple Sourdough Dog Treats into a full-on doggie party platter with a few easy flavor twists. For fall birthdays, I stir in a spoon of pure pumpkin puree and cut the dough into leaf or pumpkin shapes—instant “harvest festival” vibes on your pup’s plate. For summer parties, try unsweetened applesauce in the dough, then roll the treats thinner so they bake up extra crisp and light. If you’re hosting multiple dogs, bake a plain batch and a “special” batch with a few blueberries pressed into the tops of some treats right before baking (use fresh or frozen, no sugar). You can even mix in a sprinkle of finely chopped fresh parsley for a breath-freshening version, perfect after a round of meaty [homemade dog treats] or a rich main from your favorite healthy dog food recipes.
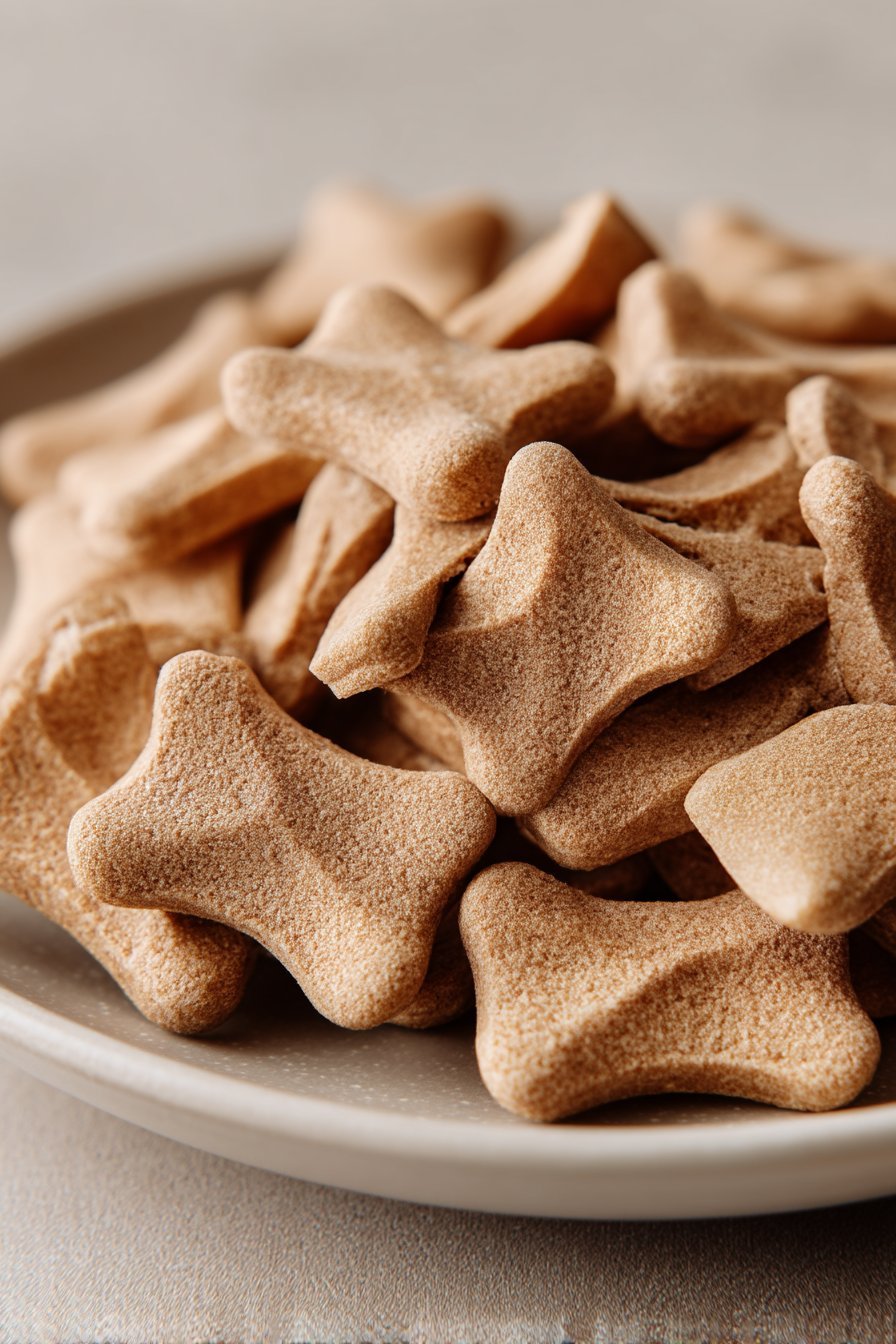
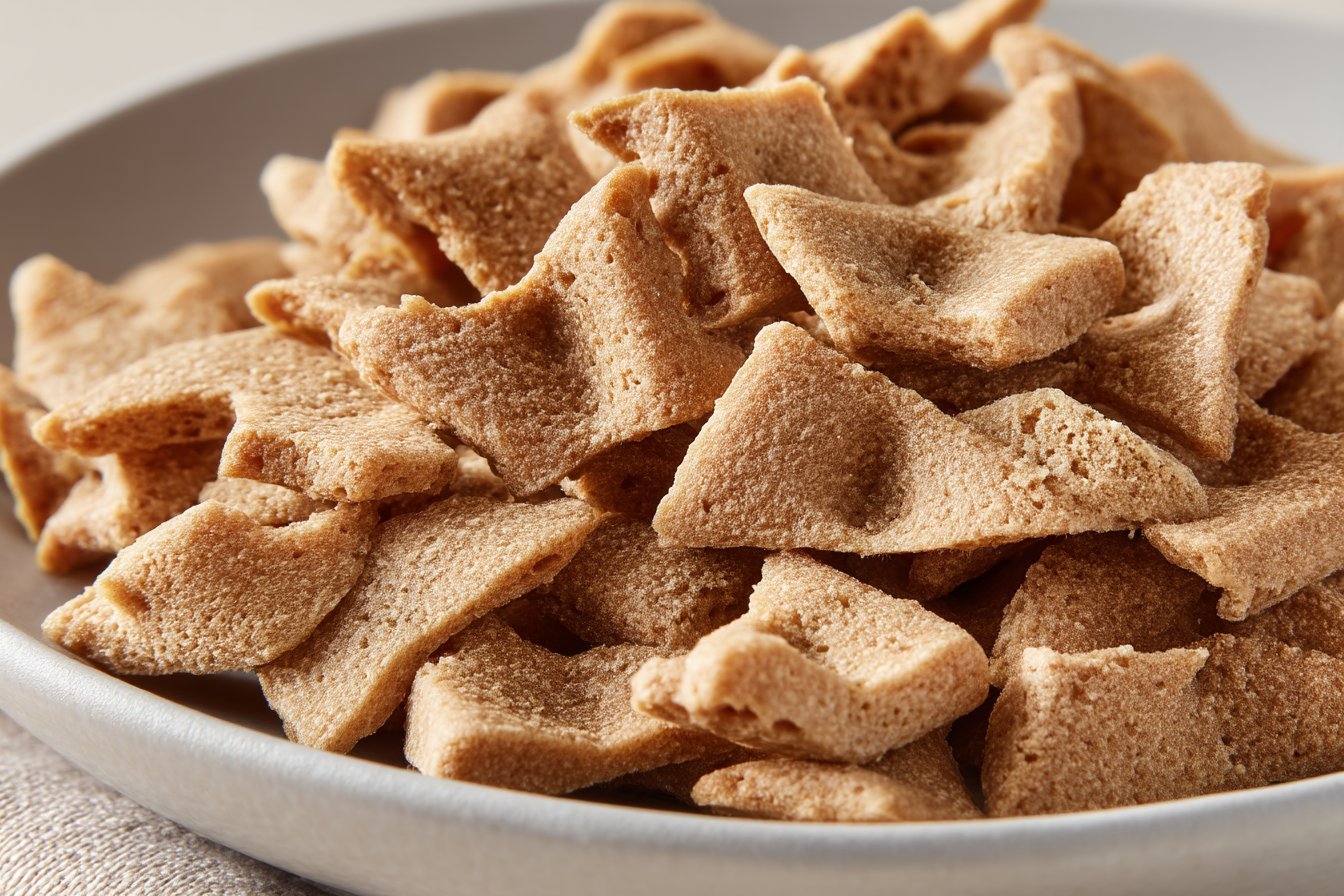
Serving of Sourdough Dog Treats
Conclusion
There’s something really special about pulling a tray of warm treats out of the oven and watching your dog’s whole body light up with excitement. These moments don’t just feed their bellies—they strengthen that quiet, comforting bond you share every day. Homemade Sourdough Dog Treats turn a simple afternoon in the kitchen into a little celebration, whether you’re baking for a Gotcha Day, a birthday, or just because your pup deserves an extra “I love you.”
I hope this recipe becomes one of those cozy traditions in your home—maybe you bake while the kids measure and stir, or you chat with a friend while the dough rests and the dogs circle your feet, sniffing the air. Don’t worry about perfection. Your dog won’t judge your shaping skills; they’ll just taste the love you put into every bite.
If you haven’t tried this recipe yet, I’d really encourage you to give it a go the next time you have leftover sourdough starter. Then come back, let me know how your pup liked them, and share your own little baking story.
For more delicious recipes like this, follow us on social media!
Are Sourdough Dog Treats safe for most dogs?
Sourdough dog treats made with fully fermented, unfed starter are generally safe for healthy adult dogs in moderation. The long fermentation helps break down some of the gluten and makes grains a bit easier to digest. However, any dog with grain, wheat, or yeast sensitivities may not tolerate them well. Always introduce a new treat slowly and watch for signs of stomach upset, itching, or loose stools. If your dog has known allergies or a sensitive tummy, talk with your veterinarian before making Sourdough Dog Treats a regular snack.
Can I use fed starter instead of discard in these Sourdough Dog Treats?
You can use either unfed sourdough discard or recently fed starter for this recipe. I prefer using discard because it cuts down on kitchen waste and usually has a tangier, more developed flavor. If you use very bubbly, freshly fed starter, your treats may puff a bit more and bake slightly faster. Make sure the starter is made from dog-safe ingredients (typically just flour and water). No sugar, milk, onions, garlic, or added fats should be in the starter you use for Sourdough Dog Treats.
How should I store homemade Sourdough Dog Treats?
Keep your baked Sourdough Dog Treats in an airtight container at room temperature for up to 5–7 days. Let them cool completely first, or trapped steam can cause mold to form sooner. For longer storage, refrigerate them for up to 2 weeks or freeze them for 2–3 months. I like to freeze them in a single layer, then transfer to a bag so I can pull out just a few at a time. Always discard any treats that smell off, look moldy, or feel strangely soft and damp.
Recipe
Easy Homemade Sourdough Dog Treats for Happy Pups
Ingredients
Method
- Preheat the oven to 350°F and line a baking sheet with parchment paper.
- Add the sourdough starter, whole wheat flour, rolled oats, egg, peanut butter, and pumpkin puree or applesauce (if using) to a medium mixing bowl.
- Stir with a sturdy spoon until the dough begins to come together into a shaggy mass.
- Use your hands to knead the dough in the bowl until it becomes smooth and firm, adding a teaspoon of flour at a time if it is sticky or a few drops of water if it is very dry and crumbly.
- Lightly flour a clean work surface with whole wheat flour and place the dough on it.
- Roll the dough out with a rolling pin to about 1/4-inch thickness.
- Use small cookie cutters or a knife to cut the dough into bite-sized shapes that are appropriate for your dog’s size.
- Transfer the cut pieces to the prepared baking sheet, spacing them slightly apart.
- Press a few extra rolled oats lightly onto the tops of the treats if desired for added texture.
- Bake in the preheated oven for 25 to 30 minutes, or until the treats are firm and lightly golden on the bottoms.
- Turn off the oven and let the treats sit inside for 5 to 10 minutes if you want them extra dry and crunchy.
- Remove the baking sheet from the oven and let the treats cool completely on the pan before serving to your dog.
- Store the cooled treats in an airtight container at room temperature for up to 5 to 7 days, or freeze for longer storage.
Notes
- Adjust treat size based on your dog’s size and chewing ability to reduce choking risk.
- For chewier treats, bake closer to 25 minutes; for crunchier, bake toward 30 minutes and let them dry in the oven with the heat off.
- You can use quick oats instead of rolled oats with similar results.
- Freeze cooled treats on a baking sheet, then transfer to a freezer bag for up to 2 months.