
The Memory Behind This Treat
The first time I whipped up these Broccoli & Chicken Dog Treats, the aroma of chicken simmering in the pot took me right back to Sunday dinners at Grandma’s. Max, my Labrador, seemed to catch that familiar scent too. His nose was in the air, tail wagging like a metronome, as he eagerly waited for his taste test. It reminded me of how keen dogs are on familiar smells, just like us.
One chilly evening, after a particularly muddy walk, I decided to experiment with some leftover broccoli and chicken from dinner. I wanted something nutritious yet simple, so I combined these with brown rice and oat flour. As the treats baked, the kitchen filled with a savory warmth. Max could hardly contain his excitement, pacing around the oven as if supervising my every move. When he finally got to try those freshly baked bites, his enthusiastic approval was all I needed to know I’d struck gold.
Creating these chicken and broccoli dog treats became a way to share a piece of my own family traditions with Max. Each batch feels like a little celebration of those comforting, home-cooked meals, crafted with love and care. Every time I make these, it’s a reminder of how the simplest ingredients can create the most joyful moments, especially when shared with our furry friends.
How To Make It (Mix & Ingredients)
Making these Broccoli & Chicken Dog Treats is a breeze, and I promise your furry friend will be tail-waggingly thankful! Start by gathering your ingredients: cooked chicken, brown rice, oat flour, an egg, and broccoli. I recommend using leftover chicken or boiling some fresh pieces for this recipe. If you’re like me and always have a stash of cooked rice, it’s perfect here. Don’t worry if you only have frozen broccoli on hand—just steam it before using.
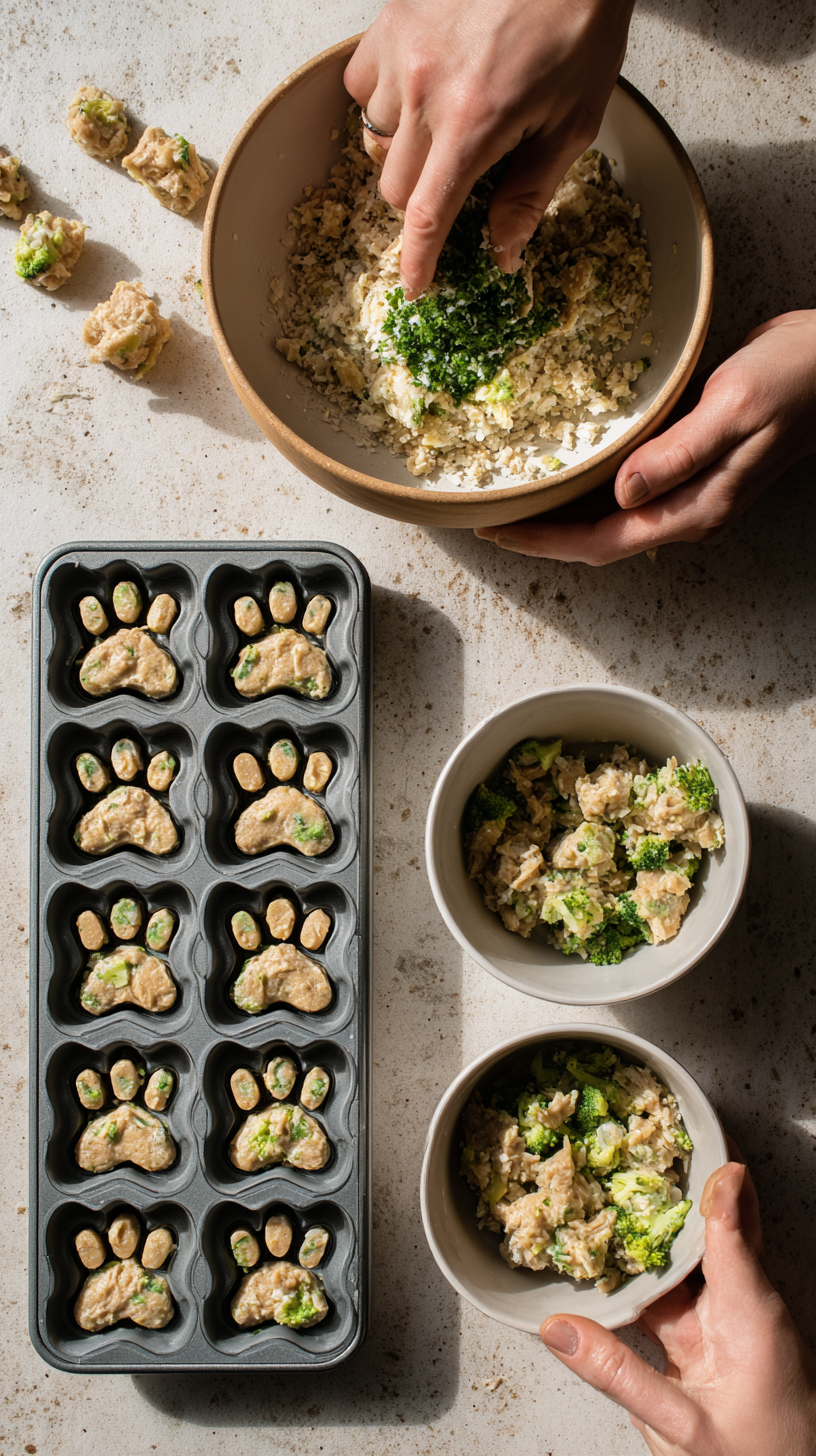
Once your ingredients are ready, preheat your oven to 350°F. Toss the chicken, brown rice, oat flour, and egg into a food processor. Give them a few pulses until they’re nicely combined. This mixture should be sticky yet firm, like a slightly messy cookie dough. If your pup loves carrots, you might want to check out my Carrot & Apple Pupcakes for a fun variation!
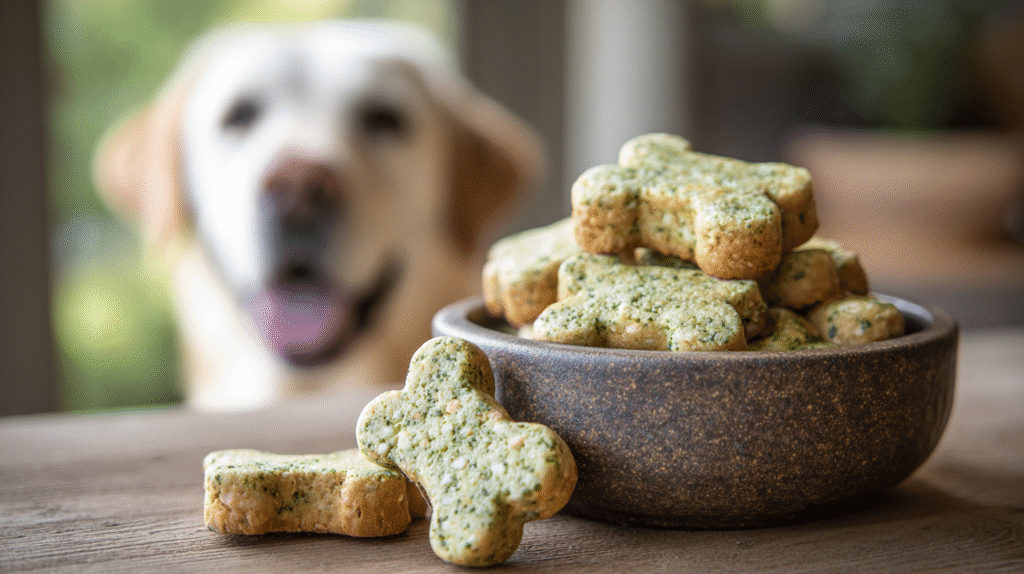
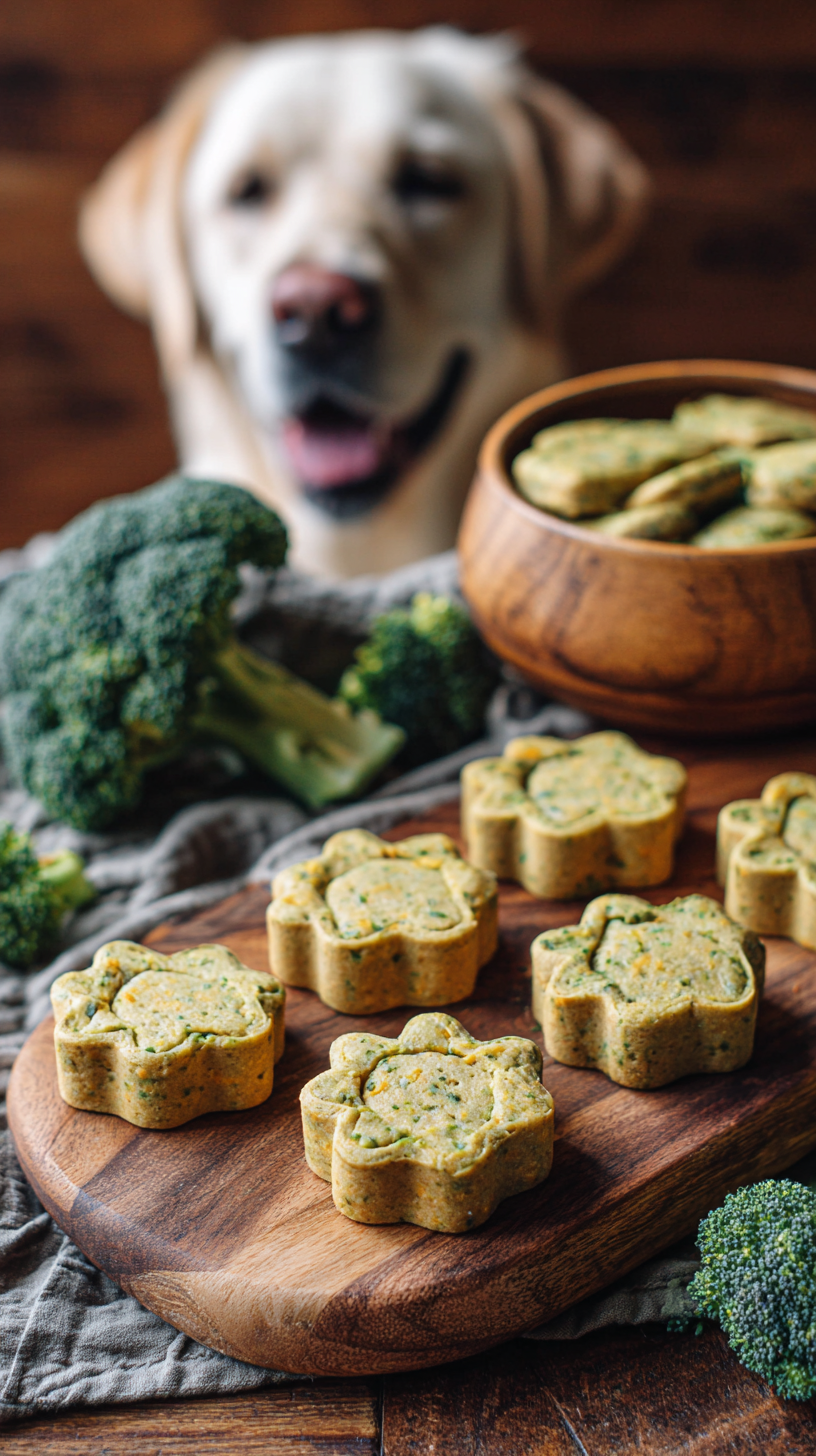
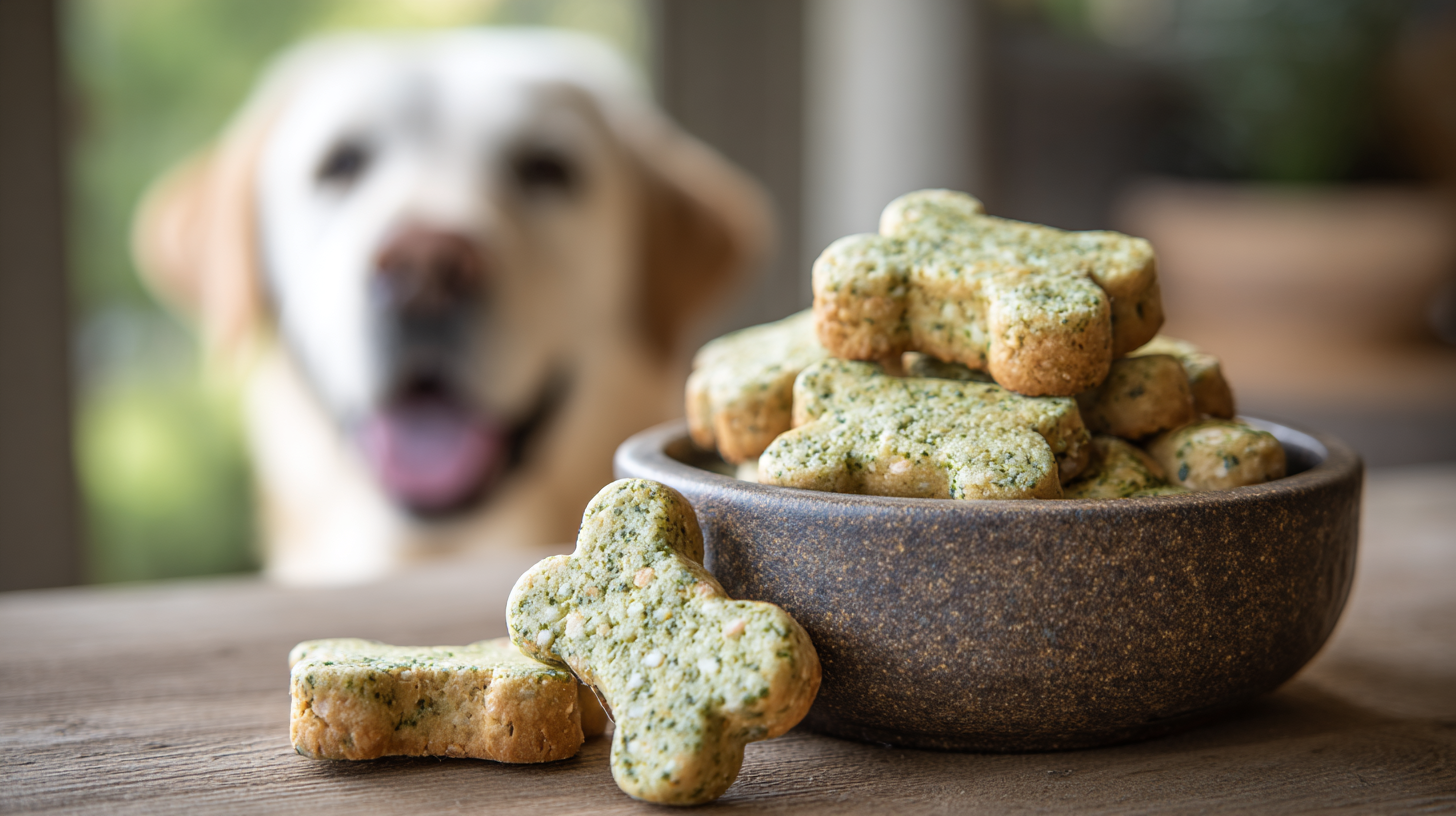
Transfer the mixture to a bowl, add the chopped broccoli, and stir well. Using silicone molds is a great way to ensure even baking and easy removal. Place these molds on a baking sheet for stability, then spoon the mixture evenly into each mold. Bake for 18-20 minutes, and let them cool completely before serving. If you’ve got extra treats, store them in an airtight container in the fridge. They’ll stay fresh and delicious for up to a week. Remember, the joy of homemade dog treats is as much in the making as it is in the wagging tails!
Make-Ahead & Storage
One of the great things about these Broccoli & Chicken Dog Treats is how easy they are to make ahead of time. You can prepare a batch over the weekend and have a steady supply of healthy snacks for your furry friend during the week. After baking, let the treats cool completely. This step is crucial for maintaining their texture and avoiding any sogginess in storage.
Once cooled, store the treats in an airtight container in the refrigerator. They’ll stay fresh and ready for wagging tails for up to a week. If you’ve made a larger batch, consider freezing some. Simply place the treats in a zip-top bag or freezer-safe container. Whenever Max gives you that hopeful look, just defrost a few at room temperature, and they’ll be as delightful as the day you baked them.
For those who love to plan ahead, prepping a few batches of these treats and freezing them ensures you always have a healthy option on hand. Remember, homemade treats like these don’t contain preservatives, which makes careful storage key. And if you’re interested in trying more recipes, check out other freezer-friendly options on my blog, like the Sweet Potato & Oatmeal Biscuits. Your pup will thank you for your culinary foresight!
Best Ingredients & Party Variations
Choosing the right ingredients for our Broccoli & Chicken Dog Treats is crucial for keeping those tails wagging and those tummies happy. Start with cooked chicken, which is lean and packed with protein, perfect for giving your pup energy for all those backyard sprints. Broccoli is a nutritional powerhouse, providing fiber and vitamins like C and K. Just be sure to steam or boil it first to make it easier on your dog’s digestive system. Oat flour is a fantastic gluten-free option that’s gentle on sensitive stomachs and adds a nice texture to the treats. And let’s not forget the humble egg—a binder filled with essential fatty acids and vitamins that work wonders for a shiny coat.
For those looking to put a festive spin on these treats, consider a few fun variations. Swapping out chicken with turkey can make for a delightful change, especially around Thanksgiving. Adding a sprinkle of parsley can freshen breath, and a bit of pumpkin puree can bring a seasonal flavor that’s also great for digestion. Shape the treats using fun silicone molds—think bones or paw prints—to add a party vibe. Remember, always introduce new ingredients slowly to make sure your pup’s tummy approves.
For more delightful recipe ideas, you might want to try our Peanut Butter and Pumpkin Dog Treats or the classic Banana Oatmeal Cookies. These options ensure your doggie dessert table is a hit!
FAQ’s About Broccoli & Chicken Dog Treat
Can dogs eat chicken and broccoli?
Dogs can definitely enjoy chicken and broccoli! Both are safe, nutritious options that provide essential proteins and vitamins. Chicken is a great source of lean protein, supporting muscle maintenance and energy. Broccoli offers vitamins C and K, fiber, and antioxidants. Always ensure you cook both ingredients to make them easier to digest and avoid adding any seasonings that may be harmful to your pup.
Is broccoli a good treat for dogs?
Broccoli can be an excellent treat for dogs in moderation. It’s low in calories and high in fiber, aiding digestion. Too much broccoli, however, can cause stomach upset, so small portions are best. Steam or boil the broccoli to soften it, making it safer for your dog to chew and digest. As with any new food, introduce broccoli gradually to see how your dog reacts.
Are chicken treats good for dogs?
Chicken treats are a tasty and beneficial snack for dogs. They provide high-quality protein necessary for building strong muscles and maintaining healthy skin and coat. Homemade treats, like the ones in our recipe, let you control the ingredients and ensure there are no harmful additives. Just remember to avoid bones and skin when using chicken, as they can pose health risks.
How should I prepare broccoli for a dog?
Preparing broccoli for your dog is simple and ensures they get all the benefits without any digestive issues. Start by steaming or boiling the broccoli until it’s soft. Cut it into small, manageable pieces to prevent choking hazards. Avoid adding salt, butter, or any seasoning that might upset your dog’s stomach. Once cooked, you can mix it into meals or use it as a standalone treat.
Conclusion
Whipping up this Broccoli & Chicken Dog Treat recipe is more than just feeding our furry friends—it’s about creating joyful moments together. As you mix, bake, and watch your pup’s eager anticipation, you’re building memories that last a lifetime. Max always knows when it’s treat time, and his excitement is contagious!
This recipe isn’t just good for your dog; it’s a bonding experience. Imagine the delight in their eyes as they taste your homemade effort. It’s a simple way to show love and care, bringing you and your pet closer.
I encourage you to try this recipe and share these special moments. You’ll feel the joy and satisfaction of knowing exactly what goes into your dog’s snacks. For more delicious recipes like this, follow us on Facebook and Pinterest!
Broccoli & Chicken Dog Treats: A Tail-Wagging Recipe
Ingredients
Method
- 1. Preheat the oven to 350°F.
- 2. Place chicken, cooked brown rice, oat flour, and egg in a food processor and pulse until combined.
- 3. Transfer the mixture to a bowl. Add the broccoli and stir to combine.
- 4. Place silicone molds on a baking sheet for stability. Spoon the mixture into the molds.
- 5. Bake for 18-20 minutes. Allow to cool completely before removing from silicone molds.
- 6. Store in an airtight container in the refrigerator.


