
The Memory Behind This Treat
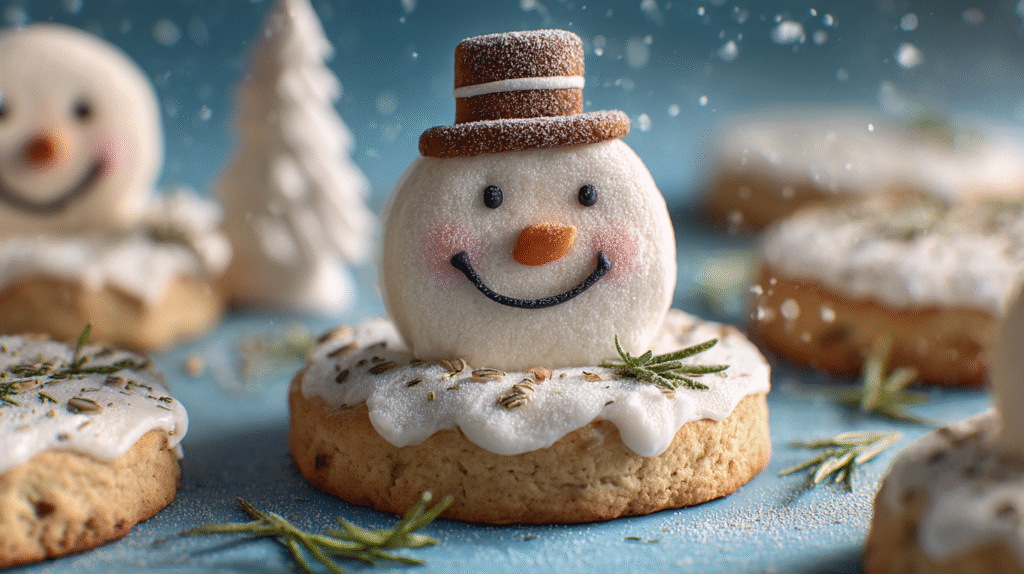
The first time I whipped up these chicken & catnip snowman cookies for dogs, winter had just blanketed our backyard with a fresh layer of powdery snow. Max, my ever-curious Labrador, pranced around in the frosty yard, leaving paw prints that resembled cookie cutter shapes. The idea struck me to create a treat that captured the whimsy of this snowy adventure, combining flavors that would delight his senses and add a bit of fun to his day.
As I gathered the ingredients, I couldn’t help but chuckle at the addition of catnip. While it’s typically a feline favorite, a pinch stirred into these cookies gives a unique aroma that dogs find intriguing. The first batch was a sight to behold—crispy snowmen with golden brown edges, perfect for a winter-themed treat. The nutty, meaty scent filled the kitchen, and Max’s nose twitched in anticipation as he watched me carefully arrange the snowmen shapes on the baking sheet.
Once baked, I let them cool on the counter, and Max patiently sat with his tail thumping against the floor. The joy on his face when he finally got his paws on one of these cookies was priceless. Every winter since, crafting these snowman cookies has been a cozy tradition, reminding me of that perfect snowy day and Max’s endless excitement. They’ve become a way to share the season’s magic with him, one delicious bite at a time.
How To Make It (Mix & Ingredients)
Creating these chicken & catnip snowman cookies for dogs is as fun as it sounds! Start by gathering all your ingredients to make the process smooth and enjoyable. Cooking for our furry friends is such a rewarding experience, especially when you see those tails wagging with joy.
Ingredients List
- 1 cup cooked, shredded chicken (make sure it’s plain, without any seasoning)
- 2 cups whole wheat flour (or oat flour for sensitive tummies)
- 1 tablespoon dried catnip (surprisingly, some dogs enjoy it too!)
- 1 egg
- 1/4 cup chicken broth (low sodium)

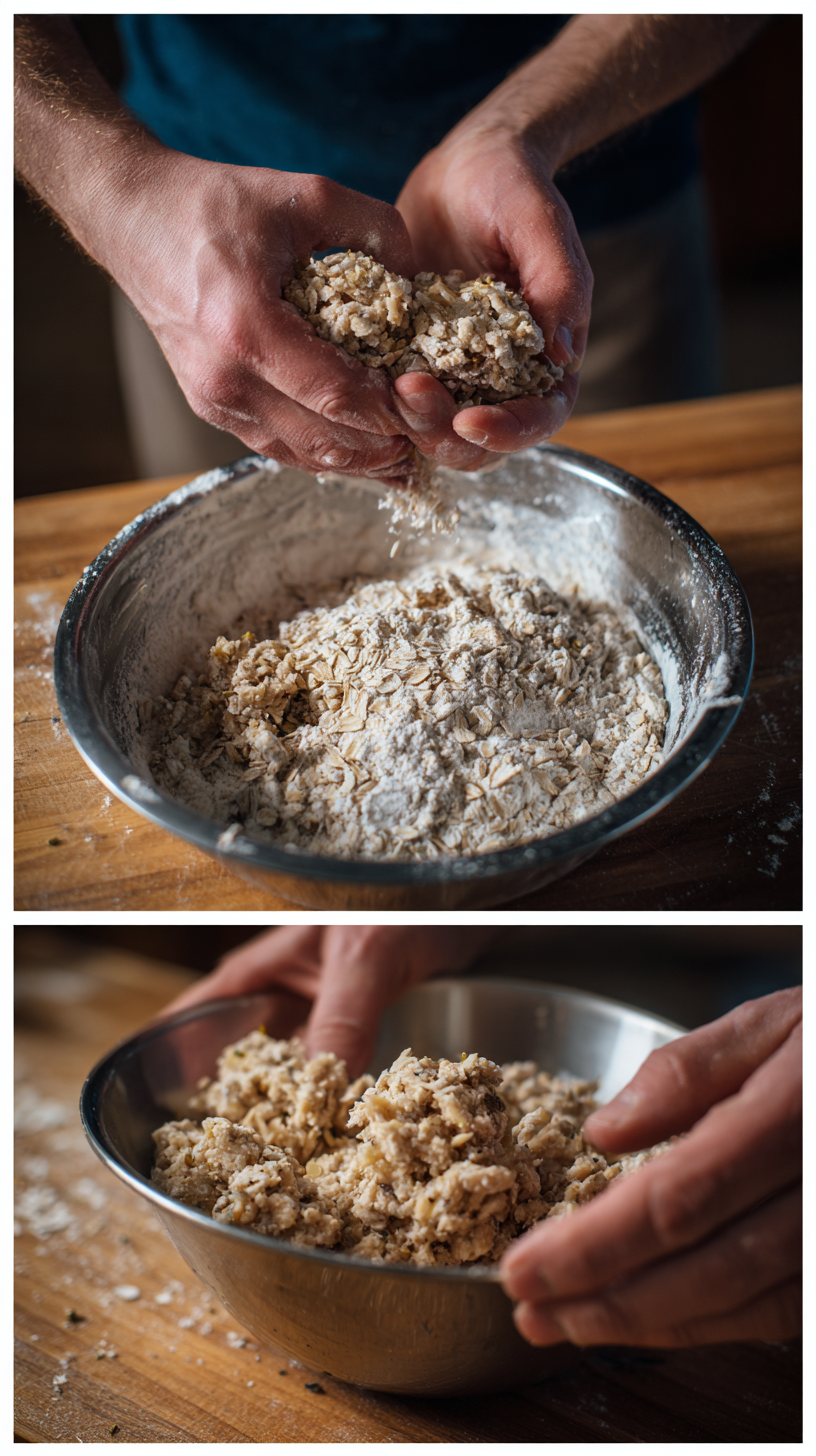
Step-by-step preparation of chicken & catnip snowman cookies for dogs
- 1 tablespoon olive oil
Safety Note: Always ensure the chicken is boneless and cooked thoroughly to avoid any risk of bone shards or foodborne illness.
Mixing It Up for Chicken & Catnip Snowman Cookies for Dogs
In a large mixing bowl, combine the shredded chicken and flour. Stir in the catnip for a touch of fun and flavor. Make a well in the center and add the egg, chicken broth, and olive oil. Mix everything together until you form a dough that is slightly sticky but holds together well.
If the dough feels too dry, add a bit more chicken broth, a teaspoon at a time. If it’s too sticky, sprinkle in a bit more flour. Once mixed, roll the dough out on a floured surface to about 1/4-inch thickness and use snowman-shaped cookie cutters to cut out your festive treats.
Pro Tip: Don’t worry if your dough isn’t perfect—Max always assures me that the taste is what counts!
Make-Ahead & Storage for Chicken & Catnip Snowman Cookies for Dogs
Making these delightful chicken & catnip snowman cookies for dogs in advance is a breeze, and it’ll save you time during the busy holiday season. Here’s how to keep them fresh and tasty for your furry friend.
Once you’ve baked a batch, let the cookies cool completely on a wire rack. This ensures they maintain their delightful crunch—something dogs absolutely adore! Transfer the cooled cookies to an airtight container. Stored this way, they’ll stay fresh for up to a week at room temperature. If you want to extend their shelf life, pop them into the fridge, where they can last up to 2 weeks. For those who like to plan well ahead, these cookies freeze beautifully. Just layer them between sheets of parchment paper in a freezer-safe container, and they’ll keep for up to 3 months. When you’re ready to serve, simply thaw them at room temperature.
Important: Always keep these treats out of reach of curious paws. While they’re irresistible, moderation is key to ensuring your dog enjoys them safely. If your pup’s tail starts wagging just at the thought of another treat, you know you’ve done something right! For more inspiration, check out our other healthy dog food recipes. Your pup will thank you with extra cuddles and wagging tails!
Best Ingredients & Party Variations
When crafting these chicken & catnip snowman cookies for dogs, choosing the right ingredients is crucial. For the chicken, opt for lean, cooked, and finely shredded breast meat. It’s gentle on your pup’s stomach and packs a protein punch. If your dog has a particular taste for turkey instead, feel free to substitute it—just ensure it’s plain and free of spices.
Adding catnip might seem unusual, but it’s perfectly safe for dogs and can add a unique twist. While most people associate catnip with our feline friends (as you’ll find in recipes like Simple Tuna Bites), some dogs find the aroma intriguing. Use it sparingly to introduce a new scent adventure for your pup. If you’re worried about it, simply leave it out, and the cookies will still be delightful.
For party variations, consider incorporating a bit of parsley for fresh breath or a sprinkle of cinnamon for a festive aroma. Using cookie cutters, shape these into fun snowmen, stars, or even bones to fit different occasions. Remember, never use xylitol—it’s toxic to dogs! If you’re planning a festive gathering, these cookies make for a charming addition to your dog’s treat platter. And if you loved these, you might also enjoy our article on creating unforgettable birthday treats to keep the celebration going!
FAQ’s About Chicken & Catnip Snowman Cookies for Dogs
Yes, catnip is safe for dogs when used in small amounts. It can have a calming effect and may even support digestion. Always use it sparingly to prevent any stomach upset. If your dog has never tried catnip before, introduce it gradually to see how they react.
Absolutely! Cooked, shredded chicken is a fantastic source of protein for dogs. Just ensure it’s plain, without any added salt, spices, garlic, or onion, as those are harmful to dogs. Make sure the chicken is thoroughly cooked and shredded to prevent any choking hazards.
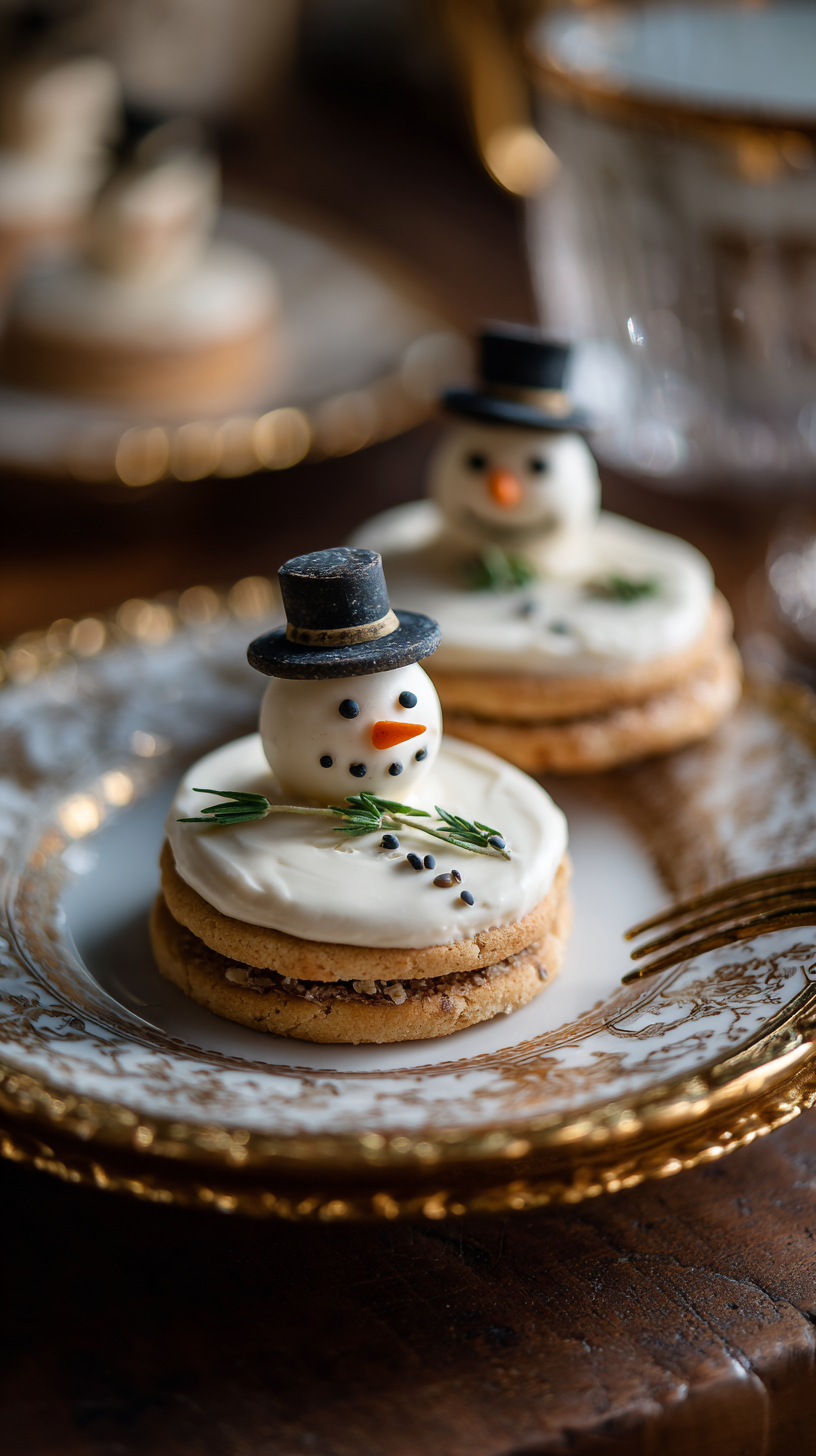
You can roll the dough into two or three small balls and stack them to form a snowman shape. Alternatively, use a snowman-shaped cookie cutter for a more uniform look. Decorate with dog-safe items like carrot bits, blueberries, or a dab of Greek yogurt, steering clear of sugary or artificial ingredients.
How long do Chicken & Catnip Snowman Cookies for Dogs last?
Because these cookies contain chicken, they have a shorter shelf life. You can store them in the refrigerator for 5 to 7 days. For longer storage, keep them in the freezer for up to 2 to 3 months. Always ensure they are fully baked and store them in an airtight container to maintain freshness.
Conclusion for Chicken & Catnip Snowman Cookies for Dogs
As you roll out these delightful chicken & catnip snowman cookies for dogs, remember that you’re not just baking a treat. You’re creating a little moment of joy that Max, and pups everywhere, will cherish. There’s something magical about seeing your dog’s eyes light up with excitement, especially when the kitchen fills with the warm aroma of these festive snacks.
Cooking together can bring families closer, whether it’s human or furry members. Picture a snowy evening, laughter in the kitchen, Max eagerly supervising, and everyone enjoying the warmth of togetherness. These cookies are more than just a treat—they’re a recipe for creating precious winter memories.
I encourage you to try this recipe and see the wagging tails it inspires. Share your experience with us, and let’s keep the joy of homemade dog treats alive. For more delicious recipes like this, follow us on social media!

Create Chicken & Catnip Snowman Cookies for Dogs: A Fun Winter Treat!
Ingredients
Method
- 1. Preheat oven to 350 degrees F and line a baking sheet with parchment paper.
- 2. In a large bowl, combine chicken and flour.
- 3. Stir in catnip.
- 4. Make a well in the center, adding the egg, chicken broth, and olive oil.
- 5. Mix until a slightly sticky dough forms.
- 6. Roll out dough to 1/4-inch thickness on a floured surface.
- 7. Cut into shapes using a snowman cookie cutter.
- 8. Place cookies on the prepared baking sheet.
- 9. Bake for 20 minutes or until firm.
- 10. Let cool completely on a wire rack.


