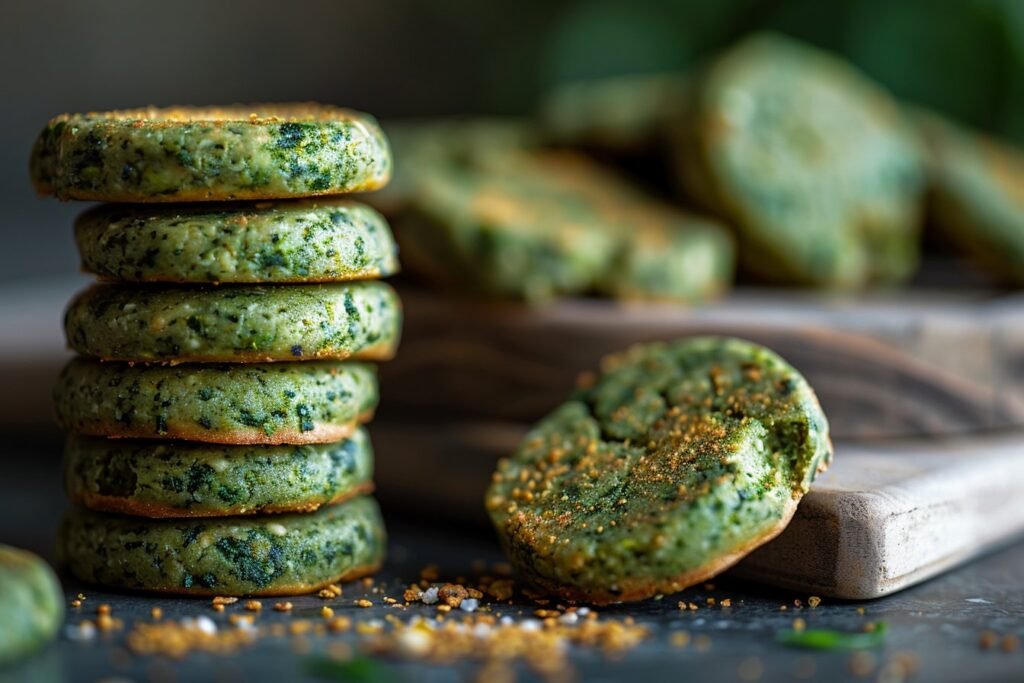
Why These Green Mints Work
These Homemade Green Dog Breath Mints work because they tackle bad breath from more than one angle, not just by covering it up. The green ingredients, like parsley or mint, bring natural chlorophyll, which helps neutralize odor in your dog’s mouth and gut instead of just masking it with strong scent. At the same time, simple add ins like oats or pumpkin give the treats structure, so you get a firm, chewy mint that your dog can actually bite into. That extra chewing time helps gently rub along the teeth, which may reduce some soft plaque and lingering food bits. You are basically turning treat time into a little cleanup session for your pup’s mouth.
From a kitchen point of view, the recipe uses pantry staples that behave predictably, so your Homemade Green Dog Breath Mints come out the same every time. A modest amount of dog safe binder, such as egg or unsweetened yogurt, brings everything together into a dough that is easy to roll and cut, rather than a sticky mess on your counter. The fat source, often a small spoon of coconut oil or similar, adds flavor and a bit of tenderness, so the mints bake up pleasantly firm yet not rock hard. You can adjust the thickness slightly for small or senior dogs, which makes this one of those easy dog meals that really fits your own household. Best of all, there are no hidden sweeteners or preservatives, and you stay in full control of what goes into your dog’s body with every single mint.
How to Make It
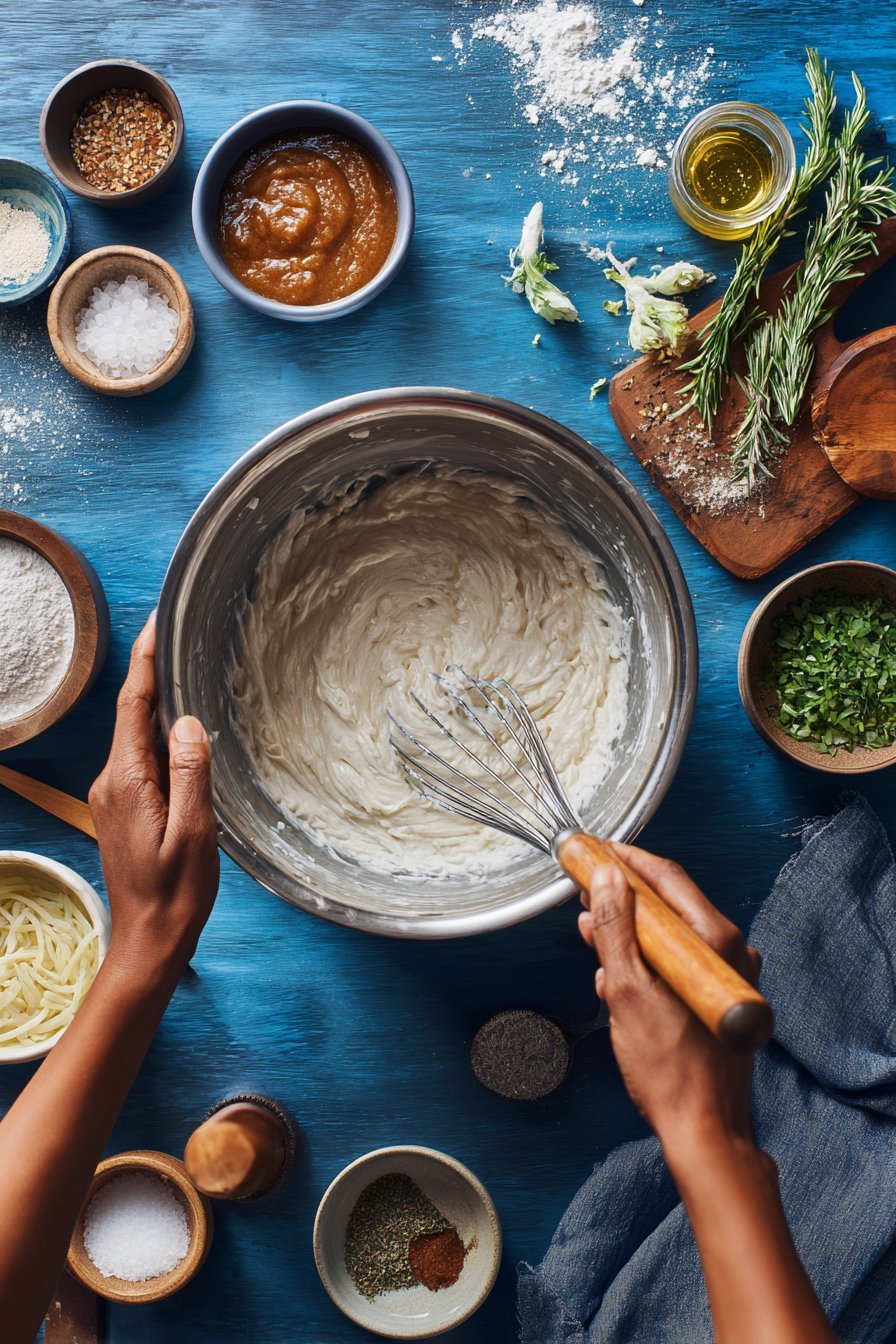
To start your Vet Inspired Homemade Green Dog Breath Mints, preheat your oven so it is fully hot before your trays go in. In a mixing bowl, whisk together your dry base, usually whole wheat or oat flour, with any powdered greens your vet has approved, like spirulina or wheatgrass. Stir in your fresh herbs, very finely chopped parsley and mint, so there are no big leafy chunks that could bake unevenly. In a separate bowl, combine your wet ingredients like plain yogurt, a little water, and a small amount of dog safe oil, then pour this into the dry mix. Use a sturdy spoon or your hands to bring the dough together until it feels soft but not sticky, like slightly tacky playdough.
Instructions Process of Homemade Green Dog Breath Mints
Lightly flour your counter, then roll the dough to about 0.5 to 1 centimeter thick so it bakes through without staying gummy in the center. Use a small cookie cutter, a knife, or even a bottle cap to cut tiny coins that suit your dog’s size and daily treat limit. Space them on a parchment lined baking sheet so they crisp, not steam. Bake until the mints are dry to the touch and just starting to firm at the edges, then let them cool completely on the tray for extra crunch. If your pup likes softer treats, you can pull them a few minutes early and let them finish setting as they cool. Once cooled, store your homemade green dog breath mints in an airtight container, and keep a separate jar for higher value rewards like my spinach and apple training bites so your dog never gets bored with flavors.
Time, Prep, and Storage Plan
You will love how simple these Homemade Green Dog Breath Mints are to fit into a busy day. Set aside about 15 minutes of prep time to gather your greens, measure, and mix the dough. The baking usually takes around 20 minutes, plus a few extra minutes for cooling before taste testing. I like to mix the dough while my coffee is brewing in the morning, then bake the treats while I clean up the kitchen. If you double the recipe, plan a few extra minutes to portion and rotate trays so everything bakes evenly.
Once your Homemade Green Dog Breath Mints are completely cool, store them in an airtight container at room temperature for 3 to 4 days. For longer storage, you can keep them in the refrigerator for up to 1 week, which also helps keep the texture firm and crunchy. If you want a bigger batch for long term use, freeze them in a freezer bag for up to 2 months, and pull out a few at a time as needed. I usually freeze them in smaller portions, about a week’s worth per bag, so they thaw quickly and stay fresh. Always toss any treats that get damp, smell sour, or grow visible mold, and remember that these breath mints are a treat, not a full meal or replacement for regular brushing.
Flexible options and serving notes
These Vet Inspired Homemade Green Dog Breath Mints should fit your real life, so you can easily scale up or down. For a tiny pup, you can shape the dough into very small coins, about the size of your thumbnail, and offer just one or two pieces at a time. For larger dogs, make slightly thicker rounds or bone shapes, and serve two to four pieces depending on their size, daily calories, and your vet’s advice. If your dog has a sensitive tummy, start with a half piece, then wait a few hours to see how their digestion and breath respond. I like to treat these Homemade Green Dog Breath Mints as part of my dog Max’s total treat allowance, not an extra, so I usually swap out one other snack when I use them.
You can store fully cooled Homemade Green Dog Breath Mints in an airtight container at room temperature for 3 to 4 days, or in the fridge for about a week, which keeps them slightly firmer and fresher. For longer storage, freeze in a single layer on a tray, then transfer to a freezer bag so you can pull out only what you need, one fresh breath emergency at a time. Let frozen treats thaw on the counter for about 10 minutes before serving so your dog can chew them comfortably, especially seniors with sensitive teeth. If you already make other easy dog meals, you can pair one small mint after dinner or after a grooming session as a calm reward. No matter how tempted you feel to give more when those puppy eyes appear, stick to moderate portions, and always offer fresh water alongside these homemade dog treats.

Serving of Homemade Green Dog Breath Mints
Conclusion
Every time I make a batch of these Homemade Green Dog Breath Mints, Max somehow knows they are for him. He sits in the kitchen doorway, nose wiggling, eyes hopeful, and I am reminded that these tiny treats carry a whole lot of love. You are not just freshening your dog’s breath. You are creating a cozy little ritual that says, “I care about your health, and I love our time together.”
I hope this recipe becomes one of those simple traditions in your home, too. Maybe your kids help cut the shapes, or you chat with a friend while the mints bake, or you reward your pup after a good walk. These are the small, sweet moments that turn into favorite memories.
Give this recipe a try, see how your dog enjoys it, and tweak it to fit your pup’s tastes. Then come back and tell me how it went. I love hearing about your dogs, your kitchens, and your wins.
For more delicious recipes like this, follow us on Facebook and Pinterest!
Recipe

Homemade Green Dog Breath Mints
Ingredients
Method
- Preheat your oven to 350°F and line a baking sheet with parchment paper.
- In a large mixing bowl, whisk together the whole wheat flour, oat flour, and powdered greens until evenly combined.
- Stir in the finely chopped parsley and mint so the herbs are well distributed with no large clumps.
- In a separate bowl, whisk the egg, plain yogurt, water, and melted coconut oil until smooth.
- Pour the wet mixture into the dry ingredients and stir with a sturdy spoon until a soft, slightly tacky dough forms.
- Lightly flour your work surface with a little oat or whole wheat flour, then turn the dough out onto the surface.
- Roll the dough to about 1/4 inch thickness, keeping it even so the mints bake uniformly.
- Use a small round cutter, knife, or bottle cap to cut small coin sized mints and place them on the prepared baking sheet, spacing them slightly apart.
- Gather and reroll any dough scraps and continue cutting until all the dough is used.
- Bake the mints for 18 to 20 minutes, or until they are dry to the touch and just starting to firm at the edges.
- Turn off the oven and let the mints sit in the warm oven for 5 minutes if you want them extra dry, then remove the tray.
- Cool the mints completely on the baking sheet, then transfer to an airtight container for storage.
Notes
- Never use xylitol, sweetened yogurt, or artificial sweeteners in dog treats, as these can be toxic to dogs.
- If your dog is very small or has dental issues, roll the dough slightly thinner or cut smaller pieces for easier chewing.
- Store at room temperature for up to 4 days, in the refrigerator for up to 1 week, or in the freezer for up to 2 months.
- Always consult your veterinarian before adding new treats if your dog has medical conditions, food allergies, or is on a special diet.